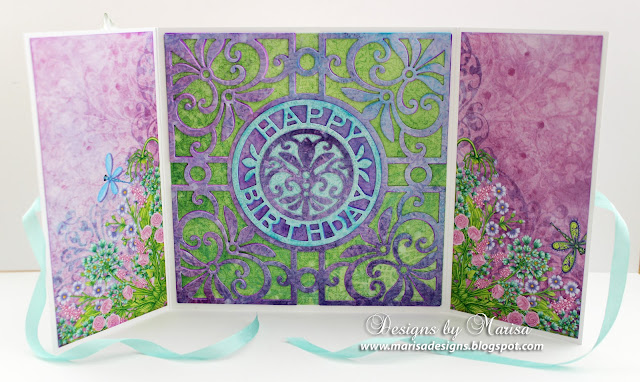
Hello Friends, today I would like to show you how to make this card created with the new French Gate and French Courtyard Die sets by Heartfelt Creations.

Heartfelt Creations Products:
HCD1-7398 French Courtyard Die
HCD1-7397 French Gate Die
HCPC-3980 Sweet Pea Cling Stamp Set
HCD1-7391 Sweet Pea Die
HCFB1-5010 Sweet Pea Shaping Mold
HCDP1-2138 Decorative Dragonfly Paper Collection
HCPC-3835
Leafy Accents Cling Stamp
HCFB1-467
3D Leafy Accents Shaping Mold
RACP436
Ranger Archival Ink Pad – Leaf Green
RACP494
Ranger Archival Ink Pad – Majestic Violet
RACP500
Ranger Archival Ink Pad – Paradise Teal
RACP985
Ranger Archival Ink Pad - Cactus Flower
HCDA2-450
Stack and Store Daubers-Pack of 30
HCST1-401
Deluxe Flower Shaping Kit
HCPP1-475
Deluxe Flower Shaping Paper Pack
of 50 - White
159723
Designer Dries Clear Adhesive
ANC850
Spring Bling Prills – 12 Pack
Other Products:
Die cutting
machine, hot glue gun, hot glue, paper trimmer, white cardstock, silk ribbon,
Ranger Stickles – Crystal.
Instructions:
To make the
6” x 6” gate fold card base, cut a piece of white cardstock to 6” x 12”. Score
at 3” and 9”. Fold at score lines towards the center to create a gate fold
card.
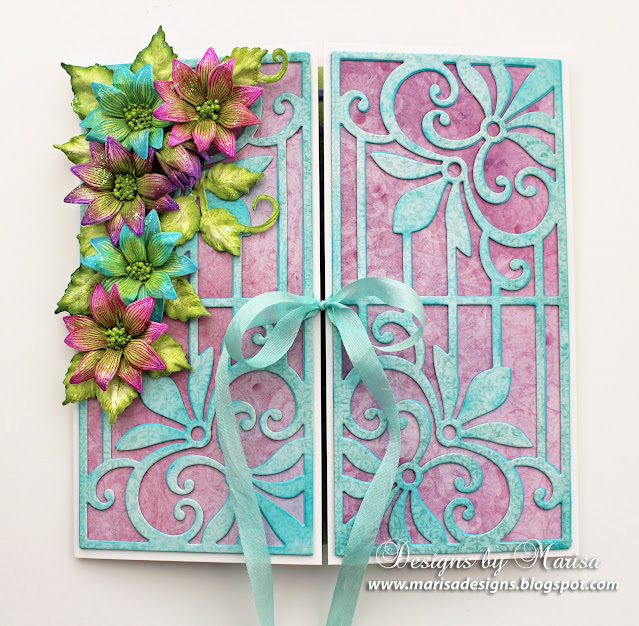
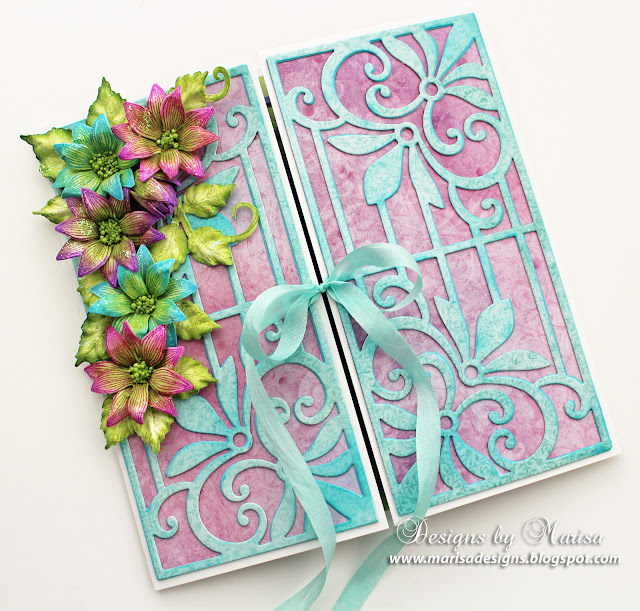
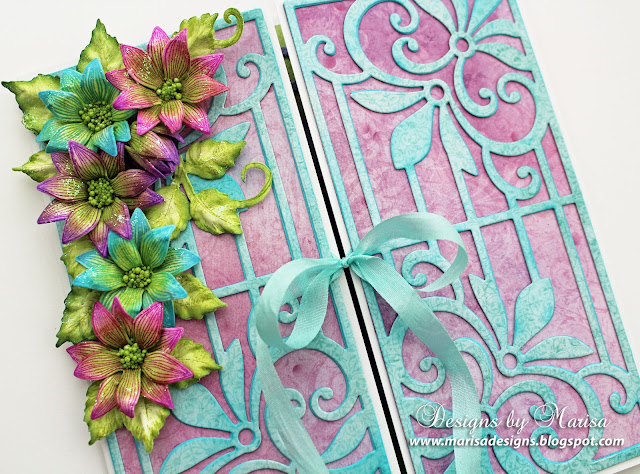
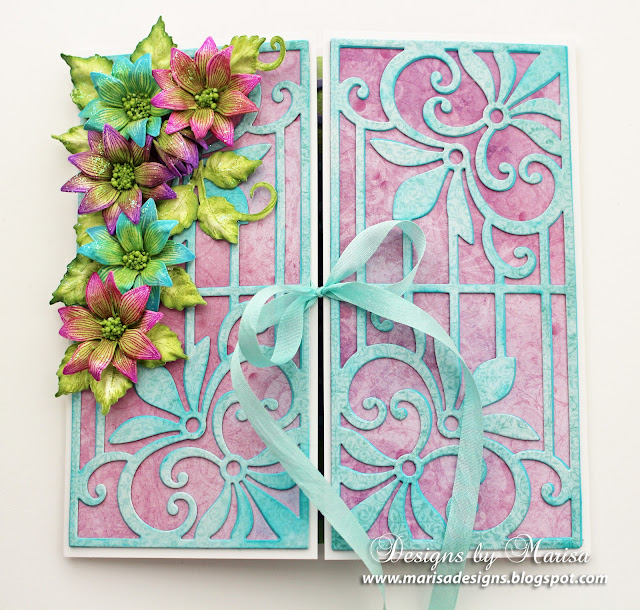
To create
card front, die cut 2 decorative pieces using French Gate Die set and
Decorative Dragonfly Paper Collection. Die cut 2 backing pieces with
contrasting color paper from the paper collection using border die and then glue
pieces together. Attach 12” of silk ribbon to both flaps using tape. Glue
decorative pieces to both front flaps to finish front of card.
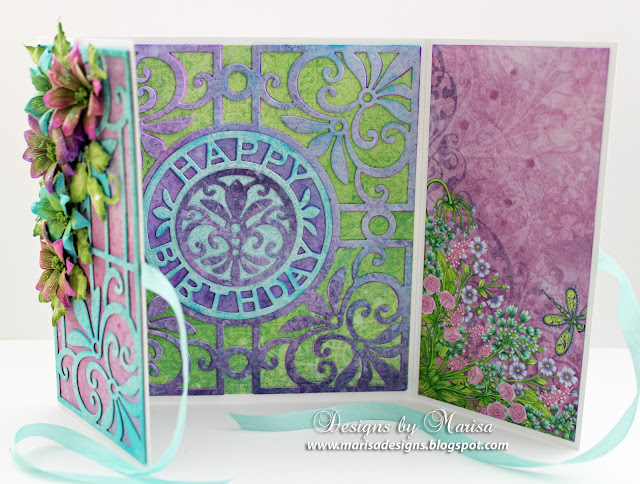
Die cut
decorative square and solid backing piece using French Courtyard Die set and
paper collection. Glue pieces together and then attach to inside of card. Die
cut Happy Birthday circle and center decorative piece. Glue pieces together and
attach to center of square. Cover inside of card flaps with paper collection,
die cut pieces with border die.
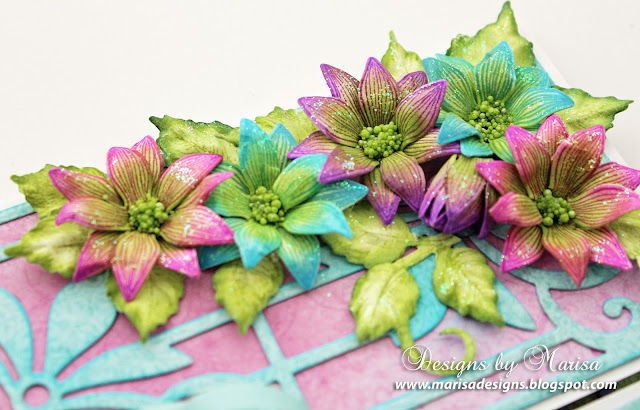
Stamp
multiple flowers with Sweet Pea Cling Stamp set using archival ink pads in
teal, violet and cactus onto flower shaping paper. Color flowers with archival
inks and daubers, then die cut with matching die and shape with Sweet Pea
shaping mold. Embellish center of flowers with green Prills.
Stamp Leafy Accents with green archival ink onto flower shaping paper. Die cut with matching die set, color with archival green ink and then shape with Leafy Accents shaping mold. Arrange flowers and leaves on front flap of card and then glue using hot glue. Using a brush, apply Crystal Stickles to flowers and leaves.