Tuesday, January 27, 2015

Heartfelt Creations - Happy Birthday Center Step Card


Hello Friends,
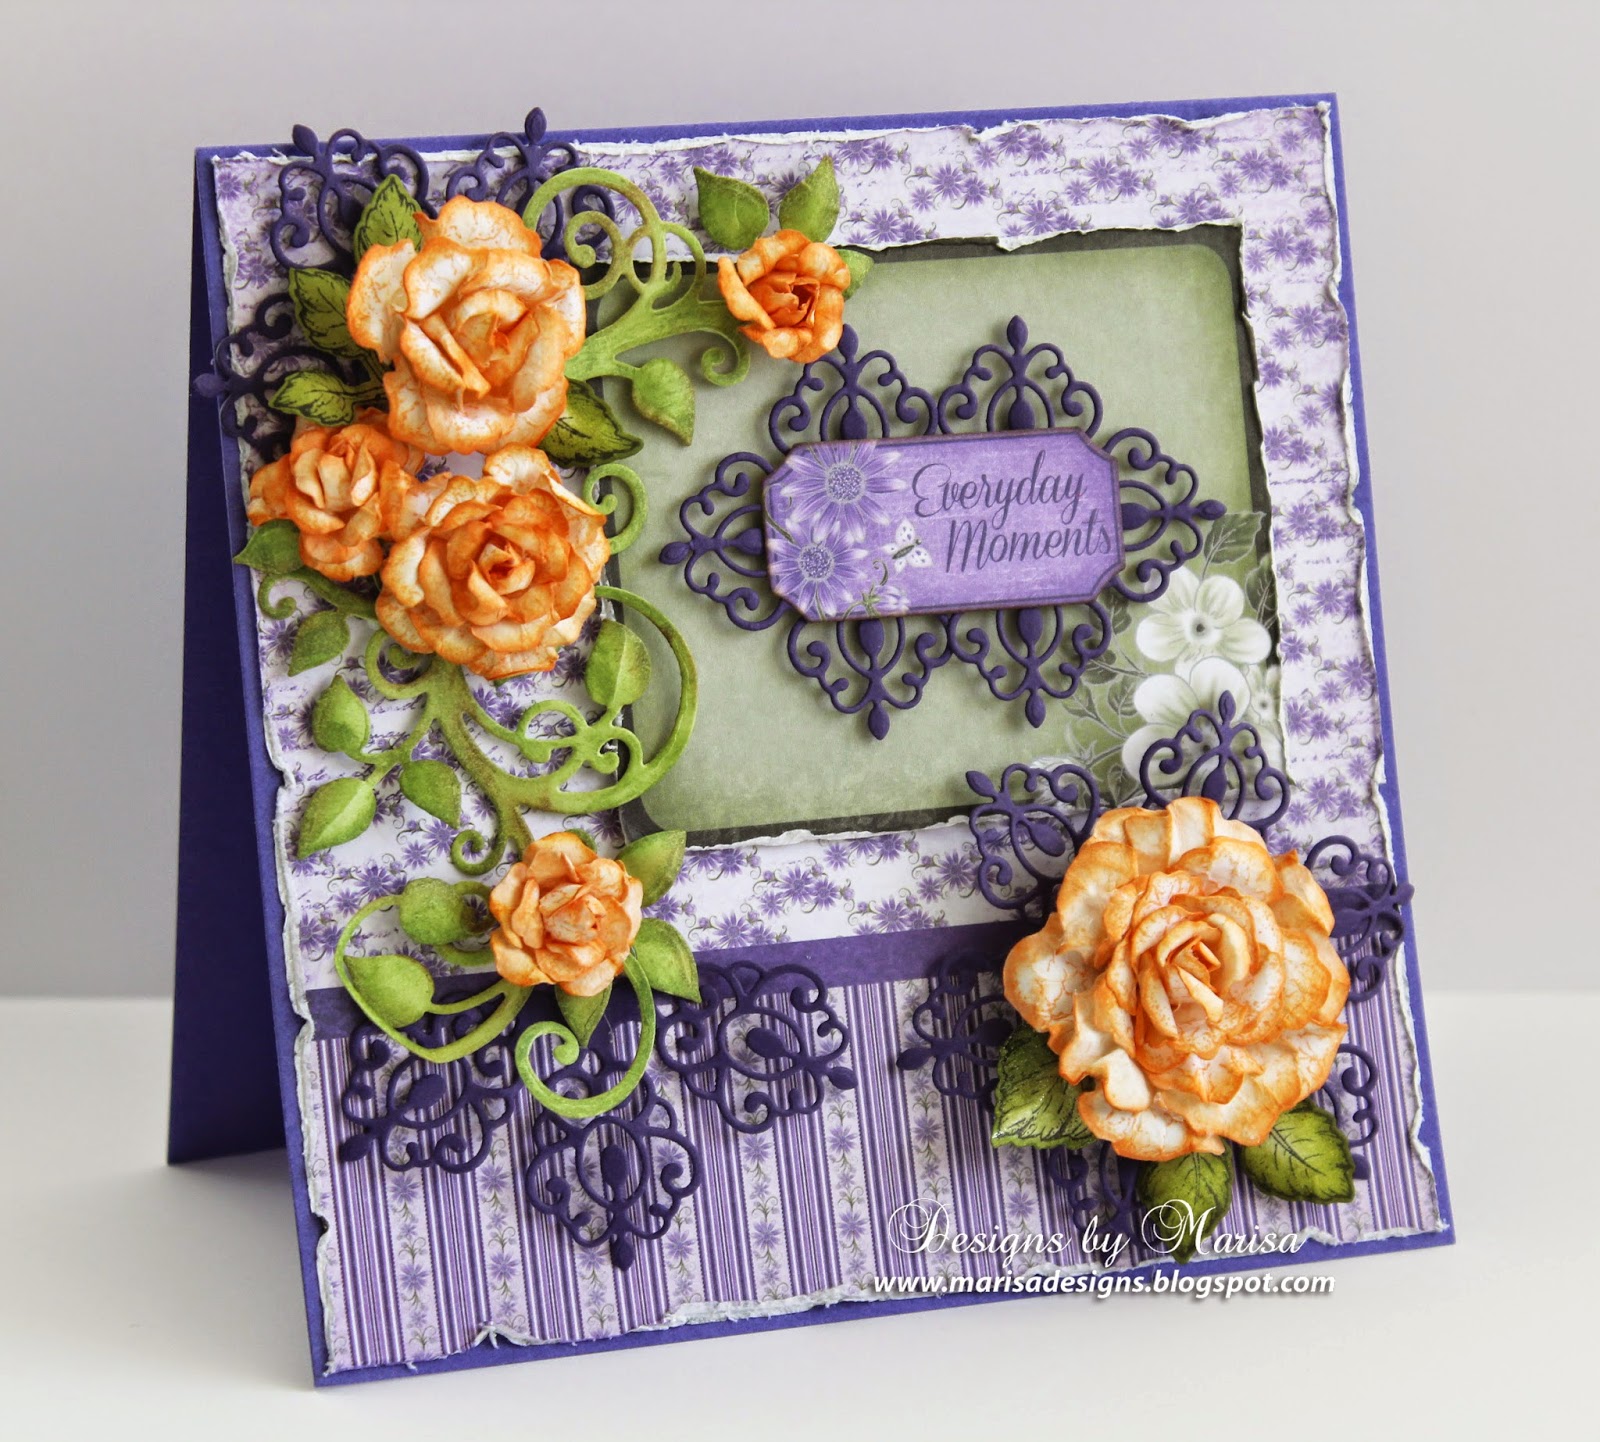
I have a Center Step Card to share with you today. I used the beautiful stamps, dies and paper from the Birds and Blooms Collection by Heartfelt Creations.


Happy Birthday - Birds and Blooms - Center Step Card

Heartfelt Creations Products:

Other Products Used:
Paper: Neenah Papers in Natural White, Pink Cardstock; Memento Ink Pad in Tuxedo Black, Ranger Distress Ink Pads in Peeled Paint, Picked Raspberry, Victorian Velvet; Chameleon Color Tones in YGE Spring Meadow, GR3 Grass Green, BL3 Sky Blue, BR5 Bark; Viva Decor Pearl Pen in gold; Foam Squares.

Instructions:
The card size for this project is 5 ½” x 5 ½”. Make a Center Step Card base with pink cardstock, follow instructions HERE. Cover card panels with Birds and Blooms Paper Collection.
Stamp Fluffy Birdies on center panel with black ink and color with Chameleon Color Tones markers. Stamp Happy Birthday sentiment with black ink.
Stamp branch and cherry blossoms from the Birds and Blooms Cling Stamp Set onto white cardstock with black ink. Die cut with coordinating dies from the Leafy Branch Die Set and Birds and Blooms Die Set. Color with distress inks and shape with Paper Blossoms molding mat and tool kit. Stamp leaves from the Leafy Branch Stamp Set, die cut with coordinating dies from the Leafy Branch Die Set. Color with distress inks and shape.

Arrange branches, flowers and leaves on card as pictured using foam squares. Embellish center of flowers with a dot of pearl pen.

Be sure to visit the Heartfelt Creation Blog for more inspiration from the Design Team.

Thanks for visiting! Hugs!

Marisa 


Tuesday, January 13, 2015

Heartfelt Creations - Birds and Blooms Layout

Hello Friends,
Does Old Man Winter have you firmly in his grip? Chase the winter blues away with a breath of springtime! Heartfelt Creations is pleased to present the "Birds and Blooms" collection: a virtual spring garden that's lovely as a song! Shades of cherry blossom pink, robin's egg blue, and soft leafy green fill sunny garden scenes featuring bluebirds, blooming branches, picket fences, bird baths, bird houses, butterflies and frilly hydrangeas. Dozens of stunning card fronts, pre-designed layouts, borders, sentiments and artwork are the perfect remedy for mid-winter doldrums. Six hand-drawn stamp sets feature blossom laden branches, nesting birds, garden scenes and an elegant collage. Two sets of dies coordinate with papers and stamps allowing you to add realistic blossoms, branches and birds to your artwork. Take a well-deserved break from the bleak landscape of winter and escape to a colorful springtime garden where birds chirp, flowers bloom, and soft breezes lift your spirit and inspire your creativity!
Here is the Layout I created with this beautiful collection.


Birds and Blooms Layout

Heartfelt Creations Products:

HCDP1-250 Birds and Blooms Paper Collection
HCPC 3644 Birds and Blooms PreCut Set
HCPC 3645 Leafy Branch PreCut Set
HCD1-756 Birds and Blooms Die
HCD1-757 Leafy Branch Die

Other Products Used:

Neenah Papers Natural White and Kraft Cardstock, Metallic Cardstock in Pearl, Spellbinders Labels Forty Decorative Accents, Ranger Distress Ink Pads (Peeled Paint, Picked Raspberry, Frayed Burlap), Memento Tuxedo Black Ink Pad, Copic Markers (E13, B93), Pink Micro Beads, Viva Décor Glitter Pen Gold, Foam Squares.

Project  Instructions:

Color edges of a 12” x 12” kraft sheet with Frayed Burlap distress ink. Cut one of the sheets from Birds and Blooms Paper Collection to 11 ¾” x 11 ¾”. Distress edges and color with distress ink. Adhere to kraft sheet.
Using designer paper, cut 2 rectangles measuring  7 ½” x 6” and 5 ¼” x 6 ½”. Distress edges and adhere to center of page. Using metallic cardstock, die cut Labels Forty Decorative Accents. Trace outer edge of die onto paper to cut background for the frame. Glue together and adhere to center of layout using foam squares. Cut picture to 4” x 3” and adhere to decorative frame.
Using natural white cardstock, stamp several branches, flowers and birds with Birds and Blooms stamp set. Die cut with coordinating dies from the set Birds and Blooms Die. Color with Peeled Paint and Picked Raspberry distress inks. Color the birds with Copic markers. Glue branches, flowers and birds around picture as shown.  Embellish small flower centers with glitter pen.
For larger flowers, stamp Vintage Morning Background set with pink distress ink onto natural white cardstock, die cut with Majestic Blooms Die. Color flowers with pink and green distress inks.  Shape flowers, layer and glue to page. Embellish center of flowers with micro beads. Stamp larger leaves from the Open Leaf set, die cut with Classic Leaf Die, color with distress ink and glue under flowers. 


Thanks for visiting! Hugs!

Marisa


Thursday, January 8, 2015

JustRite Papercraft January Release - Spring Wishes Vintage Labels Eight Clear Stamps

Hello Friends,
Welcome to Day Five of the JustRite Papercraft January Release. Today we are showcasing a beautiful set of 16 clear stamps called Spring Wishes Labels Eight Clear Stamps. This set also coordinates with Vintage Labels Eight Dies. For the background, flowers and leaves I used Sue Wilson's beautiful Craft Dies.


   Spring Wishes Vintage Labels Eight Clear Stamps      Vintage Labels Eight Dies


Instructions:

1. Cut a piece of kraft cardstock to 10" x 7", fold in half to make a 5" x 7" card base.
2. For the next layer cut designer cardstock to 6 5/8" x 4 5/8", adhere to card base.
3. Using kraft cardstock, die cut Scandinavian Collection Background - Craft Dies by Sue Wilson. Adhere to card.
4. Stamp label and sentiment from the set Spring Wishes Labels Eight Clear Stamps with black ink onto designer paper.
5. Die cut label/sentiment with coordinating die from the set Vintage Labels Eight Dies. Adhere to card using foam squares.
6. Die cut flowers and leaves with Finishing Touches Camellia Complete Petals and Finishing Touches Mosaic Leaves - Craft Dies by Sue Wilson. Color the edges of flowers with distress inks, shape and layer to form flowers. Embellish center of smaller flowers with pearls. Color leaves with distress ink. Arrange flowers and leaves on card as pictured.
7. Make bow with pink silk ribbon and adhere to card.


Supplies:

JustRite Papercraft: Spring Wishes Labels Eight Clear StampsVintage Labels Eight Dies.

Craft Dies by Sue Wilson: Scandinavian Collection BackgroundFinishing Touches Camellia Complete Petals and Finishing Touches Mosaic Leaves.
For my crafty friends outside the USA, you can purchase Sue Wilson's Craft Dies HERE.

Other Supplies: Kraft Cardstock, FabScraps - Marie Antoinette Garden Paper Collection, Neenah Papers Natural White Cardstock, Memento Tuxedo Black Ink, Rangers Distress Ink, Pink Pearls, Foam Squares, May Arts Pink Silk Ribbon.


Be sure to visit the links below for more inspiration from the Design Team:


Marisa Job (here)
  

Thanks for visiting! Hugs!!

Marisa


Tuesday, January 6, 2015

Heartfelt Creations - Everyday Moments Card

Hello Friends,
Today is Heartfelt Creations Wednesday and I have a card to share with you. I used Heartfelt Creations beautiful designer papers, stamps and dies.


Heartfelt Creations Products:


Other Products Used:

Spellbinders Grand Calibur, Neenah Paper Solar White Cardstock, Purple Cardstock, Ranger Distress Ink Mini Pads (Peeled Paint, Frayed Burlap, Spiced Marmalade), Foam Squares.

Instructions:

Cut purple cardstock to 6” x 12”, fold in half to make a 6” x 6” card base. Cut another layer a bit smaller using Cut Mat Create Paper Collection, distress edges and adhere to card base.
Cut out one of the frames from paper collection, distress edges and adhere to card with foam squares. Die cut sentiment with coordinating tag die. Die cut several lace flowers from the Arianna Lace Die set, cut petals and glue behind sentiment tag.  Adhere tag to card with foam squares.
Stamp Vintage Floret flowers with Spiced Marmalade distress ink onto white cardstock. Die cut with coordinating Vintage Floret dies, shape flowers with Paper Blossoms Molding Mat and Tool Kit. Glue petals together to form roses.
Die cut large vine from the Cut Mat Create die set with white cardstock, color with distress ink and adhere to card. Glue flowers on top of vine and lace flowers. Stamp and die cut leaves and glue under flowers as pictured.


Thanks for visiting! Hugs!

Marisa


JustRite Papercraft January Release - Sentimental Damask Vintage Labels Eight

Hello Friends,
Welcome to Day Three of the JustRite Papercraft January Release. Today we are showcasing Sentimental Damask Vintage Labels Eight Clear Stamps. This is a beautiful set of 23 clear stamps. For my card I also used my new favorite background stamps Script Cling Background Stamp.


  Sentimental Damask Vintage Labels Eight Clear Stamps    Script Cling Background Stamp


Instructions:

I started by cutting kraft cardstock to 6" x 12", folded in half to make a 6" x 6" card base. I cut  the next layer using designer paper to 5 3/4" x 5 3/4", distressed the edges and adhered to card.
I stamped  Script Cling Background Stamp with black ink onto designer paper, distressed edges and adhered to card center.
I used Spellbinders Heirloom Oval Die to cut decorative frame. I used Sentimental Damask Vintage Labels Eight Clear Stamps to stamp sentiment in black ink and small flower in light blue ink as the background behind the sentiment.
The flowers and leaves were die cut with Spellbinders Rose Creations and Sprigs using designer paper. For the bow I used silk ribbon.


Supplies:

JustRite Papercraft: Sentimental Damask Vintage Labels Eight Clear StampsScript Cling Background Stamp.

Spellbinders Dies: Heirloom Oval DieRose Creations and Sprigs.

Other Supplies: Kraft Cardstock, Prima Marketing Nature Garden Paper Collection, Ranger Distress Inks, Silk Ribbon, Foam Squares.


Be sure to visit JustRite Papercraft for more inspiration from the Design Team.


Thanks for visiting! Hugs!

Marisa


Monday, January 5, 2015

JustRite Papercraft January Release - Floral Basket Clear Stamps

Hello Friends!

Happy New Year 2015!!! I hope you all had a wonderful Holiday Season. We had a great time with friends and family celebrating Christmas and the New Year.

JustRite has several gorgeous stamp sets for the January Release. Today we are showcasing Floral basket Clear Stamps and Reversed Crackle Cling Background Stamp, I used both sets for my card. I also used Crackle Cling Background Stamp.


    Floral Basket Clear Stamps         Reversed Crackle Cling Background Stamp


The card base measures 6" x  5". I stamped the Reversed Crackle Cling Background Stamp with brown ink onto natural white cardstock. I then cut it into 9 pieces and adhered to card base.
The decorative frame was die cut with Spellbinders Labels Forty Decorative Accents. I stamped Crackle Cling Background Stamp on frame and adhered to card with foam squares.
I used my electronic cutting machine to cut Floral Basket Digital Cut SVG File and then stamped the floral basket from Floral basket Clear Stamps with Versamark and heat embossed with black embossing powder. I colored the image with Spectrum Noir Markers and attached to card with foam squares.
I stamped sentiment with Versamark and heat embossed with black embossing powder.
I used purple silk ribbon for the bow and white pearls for the center of flowers.


Supplies:

JustRite Papercraft: Floral basket Clear Stamps, Reversed Crackle Cling Background StampCrackled Cling Background Stamp and Floral Basket Digital Cut SVG File.

Spellbinders Dies: Labels Forty Decorative Accents

Other Supplies: Neenah Paper Natural White Cardstock, Versamark, Black Embossing Powder, Spectrum Noir Markers, Rangers Distress Ink Mini Pads, Foam Squares, White Pearls, Silk Purple Ribbon.

Be sure to visit the links below for more inspiration from the Design Team.


Thanks for visiting! Hugs! 

Marisa