Wednesday, April 30, 2014

JustRite Papercraft May Release - Doily One Card

Hello Friends!
Welcome to the first day of the JustRite Papercraft May Release. Today we are showcasing Doily One Cling Stamps, a beautiful set of 10 cling stamps and the coordinating SVG Doily One Digital Cut File Download.


   Doily One Cling Stamps       
   

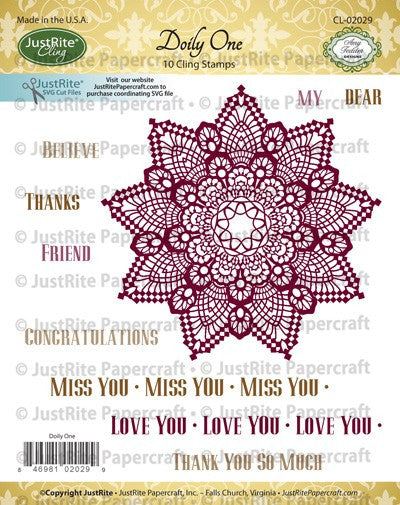
For my card I cut a 4" x 6" card base using kraft cardstock. The background paper was created by stamping Doily One on white cardstock with Versamark and then heat embossing the images with white embossing powder. Then I used distress inks to color the background. You can also use Gelatos to achieve a similar effect. The center panel measures 4 1/4" x 4 1/4" and was adhered to card using foam squares.
For the focal element I cut Doily One using the coordinating  SVG Doily One Digital Cut File Download and stamped the doily with Versamark and heat embossed with white embossing powder. I attached white pearls to doily corners and adhered to center panel using foam squares.
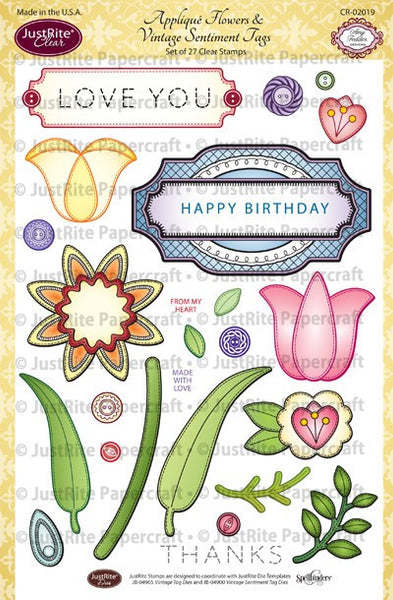
For the flower I used Spellbinders Create a Sunflower die set and the swirls were die cut with Foliage Flourish. The sentiment was stamped on natural white cardstock with Memento Rich Cocoa.

JustRite Papercraft is having a great sale on Faber-Castell products and Spellbinders Dies!!!


Supplies:

Other Supplies: Kraft Carstock, Neenah White Cardstock, Ranger Distress Inks, Memento Rich Cocoa, White Pearls, Foam Squares, Versamark, White Embossing Powder.

Be sure to visit the links below for more inspiration!!

Thanks for visiting! Hugs!

Marisa


Tuesday, April 22, 2014

Heartfelt Creations Wednesday - Enjoy the Ride Center Step Card

Hello Friends!
I had so much fun making this Center Step Card using the new beautiful Celebrate the Journey Collection by Heartfelt Creations. I also used the paper in this collection and the Vintage Floret die set to make the flowers in this card.


Heartfelt Creations Products and Products Carried by HC:


Other Products Used:

Neenah Papers Brown and Natural White Cardstock, Memento Rich Cocoa Ink Pad, Ranger Distress Ink Pads, Copic Markers, Foam Squares, Pearl Trim.


Project Instructions:

The card size for this project is about 5 ½”  x 5 ½”.  Go to this link to follow instructions on how to make a Center Step Card. Using Celebrate the Journey paper collection, cut the panels to cover the card base.
Stamp Celebrate the Journey Sentiments on natural white cardstock with brown ink. Die cut with coordinating Once Upon a Time Die. Color some of the pieces using Copic markers and distress inks and adhere to card with foam squares.
Stamp Luggage from the Luggage and Sentiments set with brown ink on blue paper from the Celebrate the Journey collection. Die cut with coordinating die from Luggage and Tags. Color with Copic markers and distress ink. Assemble luggage and glue on card center panel as pictured.
Using Luggage and Tags die set, die cut tags and ticket stubs from the Celebrate the Journey paper collection. Color edges with distress inks and adhere to card with foam squares.

Die cut flowers with Vintage Floret die set using Celebrate the Journey paper collection. Color edges with distress ink, shape and layer to form roses. Die cut leaves with Classic Leaf die set, color edges with distress ink and shape. Arrange flowers and leaves on card using hot glue.

Be sure to visit the Heartfelt Creation Blog for more inspiration.

Thanks for visiting! Hugs!

Marisa


Tuesday, April 15, 2014

Heartfelt Creations Wednesday - The World Needs More People Like You Card

Hello Friends!
Welcome to another Wednesday with Heartfelt Creations. For my card I used the new beautiful papers from the Celebrate the Journey Paper Collection and the flowers were die cut with one of my favorite dies Vintage Floret Die.


Heartfelt Creations Products and Products Carried by HC:


Other Products Used:

Pink cardstock, Spellbinders A2 Devine Eloquence Die and Labels Twenty Eight Die Set, Ranger Distress Ink, Foam Squares, Pearls.

Project Instructions:

The card size for this project is 6 ¼” x 6 ¼” in pink cardstock. Using Celebrate the Journey paper collection, cut 3 panels measuring  6” x 6”,  5 ¼” x 6” and  4 ¼” x 5 ½”.  Distress the edges and adhere to card base.
Using pink cardstock, die cut largest Devine Eloquence die and glue to center of card. Die cut one of the sentiment panels from Celebrate the Journey paper collection using Labels Twenty Eight die. Color the edges with distress ink and adhere to card using foam squares.
Using Celebrate the Journey paper collection, die cut flowers with Vintage Floret die set. Color the edges with distress ink, shape and layer the petals to form flowers.  Attach the flowers to card using glue and foam squares.  Die cut leaves with Classic Leaf die, color the edges with distress ink, shape and glue under flowers.  Attach pearls under flowers using glue. 

Be sure to visit the Heartfelt Creations Blog for more inspiration.


Thanks for visiting! Hugs!

Marisa


Tuesday, April 8, 2014

Heartfelt Creations April Release - Thinking of You Card

Hello Friends!
Heartfelt Creations invites you to “Celebrate the Journey” with this classic travel-themed collection.  Whether you are traveling around the world or around the block, you will find papers, stamps and dies to document your life’s adventures.  The coordinating stamps and papers feature maps, compass roses, bicycles, hot air balloons, vintage suitcases, boarding passes and postcards. The clever Luggage and Tag die even creates a delightful 3-D suitcase! Soft hues of light green, deep teal, pink and rose merge with subtle, neutral backgrounds that are richly layered with beautiful fonts, flourishes and focal images.  “Celebrate the Journey” is just the ticket for both masculine and feminine projects, the perfect traveling companion for all of life’s journeys great and small. Leave a comment on the Heartfelt Creation blog by April 15th and you will be entered to win the entire collection valued at $180.00.


Heartfelt Creations Products and Products Carried by HC:


Other Products Used:

Neenah Paper Natural White Cardstock, Ranger Distress Ink Pads, Copic Markers, Rhinestones, Foam Squares, Seam Binding Ribbon, Metal Hanger.

Project Instructions:

The card size for this project is 6 ½” x  6 ½”.  Make card base using natural white cardstock, color edges with distress ink. Cut a 6 ¼” x 6 ¼”  layer using Celebrate the Journey paper collection, distress the edges and adhere to card.
Stamp Floral Dress Collage twice on natural white cardstock. Cut one of them to 4 ¼” x  5 ¾”. Fussy cut the dress and flowers from the second stamped collage, color with distress inks and Copic markers and adhere to first image using foam squares. Glue metal hanger under dress.
Die cut 2 Decorative Lace Borders and glue under stamped image and then adhere to card.
Make a bow using pink seam binding ribbon, glue to card. Adhere some flowers on top of bow. Embellish flowers with rhinestones.

Be sure to visit the Heartfelt Creation blog for more inspiration.

Thanks for visiting! Hugs!

Marisa


Saturday, April 5, 2014

JustRite Papecraft April Release - Congrats Vintage Labels Three and Seven Cling Stamps

Hello Friends!
Welcome to the last day of the JustRite Papercraft April Release. Today's release is a gorgeous set of 13 cling stamps called Congrats Vintage Labels Three and Seven Cling Stamps. For my card I also used Vintage Labels Three Dies to die cut the label and sentiment.


Congrats Vintage Labels Three & Seven Cling Stamps    Vintage Labels Three Dies


I started my card by cutting a 5" x 7" card base with kraft cardstock. I cut the next layer with patterned paper a bit smaller and adhered to card base.
For the background I die cut 4  Spellbinders Decorative Labels Eight, I used the second die from the smallest and kraft cardstock. I also cut 4 Labels Eight with patterned paper and adhered to labels and then onto card using foam squares.
I stamped the label and sentiment from the Congrats Vintage Labels Three and Seven Cling Stamps set with brown ink and die cut with Vintage Labels Three Dies. I colored label with Spectrum Noir Markers and attached to center of card using foam squares.
For the flowers I used Spellbinders Bitty Blossoms and for the leaves I used Sprigs and Foliage Two.

Supplies:

JustRite Papercraft: Congrats Vintage Labels Three and Seven Cling Stamps, Vintage Labels Three Dies
Spellbinders: Decorative Labels EightLabels EightBitty BlossomsSprigs, Foliage Two
Other Supplies: Neenah Natural White Cardstock, Kraft cardstock, Prima Marketing Art Journal Pad, Memento Brown Ink, Ranger Distress Ink, Foam Squares, Spectrum Noir Markers


Be sure to visit the links below to see the beautiful projects the JustRite Design Team has created.


Thanks for visiting! Hugs!

Marisa


Friday, April 4, 2014

JustRite Papercraft April Release - Garden Tools Clear Stamps

Hello Friends!!
Welcome to Day Three of the JustRite Papercraft April Release. Today we are showcasing another gorgeous set of 19 stamps called Garden Tools Clear Stamps and coordinating SVG Garden Tools Digital Cut File Download. For my card I also used the new just released Quilted Circles Cling Background Stamp also designed by Amy Tedder.


  Garden Tools Clear Stamps    Quilted Circles Cling Background Stamp


I started my card by cuting a 5" x 7" card base with Teal metallic cardstock. The next layer was die cut with Spellbinder Majestic Labels Twenty Five using pink cardstock.
I stamped Quilted Circles Cling Background Stamp on patterned paper with black ink. I colored the background with Spectrum Noir Markers and then I used Spellbinders Labels Twenty Five to die cut the background and adhered to card using foam squares.
I stamped "Springtime" sentiment on natural white cardstock and die cut it with Vintage Labels Seven Dies. I used distress ink around the edges and then attached to card with foam squares.
For the flowers I used Carnation Creations and Bitty Blossoms. For the leaves and swirls I used Foliage, Bitty Blossoms and Sprigs.


Supplies:

JustRite Papercraft: Quilted Circles Cling Background StampGarden Tools Clear StampsSVG Garden Tools Digital Cut File DownloadVintage Labels Seven Dies
Spellbinders: Majestic Labels Twenty FiveLabels Twenty FiveCarnation Creations, Bitty BlossomsSprigsFoliage
Other Supplies: Teal Metallic Cardstock, Pink Cardstock, Neenah Natural White Cardstock, Spectrum Noir Markers, Ranger Distress Inks, Memento Tuxedo Ink, Foam Squares, Rhinestones.

Be sure to visit the links below for more inspiration.


Thanks for visiting! Hugs!

Marisa


Thursday, April 3, 2014

JustRite Papercraft April Release - Home Tweet Home Clear Stamps

Hello Friends!
Welcome to Day Two of the JustRite Papercraft April Release. Today we are showcasing a beautiful set of 21 clear stamps called Home Tweet Home Clear Stamps and coordinating SVG Home Tweet Home Digital Cut File Download. We also have another great background stamp releasing today called Stitched Circles Cling Background Stamp, both sets designed by Amy Tedder.
For my project I decided to make a Pop-Up Box Card using both sets, I think they work perfect for this project. I also used Vintage Labels Seven Dies to cut the sentiment. I had so much fun making this project, I hope you are inspired to make one too.


Here is a picture of the Box Card when closed:


   Home Tweet Home Clear Stamps       SVG Home Tweet Home Digital Cut File Download for CR-02042


  Stitched Circles Cling Background Stamp     Vintage Labels Seven Dies


Instructions:

1. Follow instructions on how to make a Pop-Up Box Card HERE
2. For the panels covering the box, I stamped Stitched Circles Cling Background Stamp on light patterned paper with black ink and colored with Spectrum Noir Markers
3. I used SVG Home Tweet Home Digital Cut File  Download to cut all the cut files for the images in the stamp set and then I stamped the images with Home Tweet Home Clear Stamps. I used Spectrum Noir Markers to color the images. Once I had all the images cut, stamped and colored, I proceeded to follow the instructions from the tutorial on how to attach them to the box. If you don't have an electronic cutter, you can stamp the images on natural white cardstock and then fussy cut them.
4. I stamped the sentiment on natural white cardstock and die cut it with the coordinating die from Vintage Labels Seven Dies. I adhered the sentiment to box front using foam squares. I added some flowers, leaves and bow around the sentiment as pictured. I also attached rhinestones to the center of all the flowers.

Supplies:

JustRite Papercraft: Home Tweet Home Clear Stamps, SVG Home Tweet Home Digital Cut File  Download, Stitched Circles Cling Background StampVintage Labels Seven Dies

Other Supplies: Neenah Natural White Cardstock, Prima Marketing Art Journal Pad, Foam Squares, Rhinestones, Acetate Sheet, Spectrum Noir Markers, Memento Tuxedo Black Ink, Ranger Distress Ink, Ranger Glossy Accents, Foam Squares.


JustRite Papercraft is having a sale on Spellbinders dies!  25% off all Spellbinders Dies.


Be sure to visit the links below to see beautiful projects created by the JustRite Design Team.


Thanks for visiting! Hugs!

Marisa


Wednesday, April 2, 2014

JustRite Papercraft April Release - Applique Flowers & Vintage Sentiment Tags

Hello Friends!
Welcome to Day One of the JustRite Papercraft April Release. Today we have 2 beautiful sets to showcase, Applique Flowers & Vintage Sentiment Tags Clear Stamps and coordinating SVG Applique Flowers & Vintage Sentiment Tags Digital Cut File Download and Burlap Cling Background Stamp. I also used Vintage Tag Dies.


 Appliqué Flowers & Vintage Sentiment Tags    


Burlap Cling Background Stamp       Vintage Tag Dies


JustRite Papercraft is having a great sale on Faber-Castell products!


Instructions:

1. Make a 6" x 6" brown card base. Using natural white cardstock, cut a 5 3/4" x 5 3/4" panel, emboss with an embossing folder, color embossed areas with distress ink, distress edges and adhere to card base.
2. Cut a 4" x 5" panel, stamp with Burlap Cling Background Stamp using distress brown ink. Mat background with brown cardstock and adhere to card.
3. Stamp tag and sentiment, color with Spectrum Noir markers, die cut with coordinating tag die from Vintage Tag Dies. Adhere to center of card using foam squares.
4. Cut flowers and leaves using SVG Applique Flowers & Vintage Sentiment Tags Digital Cut File Download and then stamp flowers and leaves on the coordinating cut files. Color with Spectrum Noir  markers and adhere to card using foam squares.
5. Make a brown bow using seam binding ribbon and attach to card.

Supplies:

JustRite Papercraft:  Applique Flowers & Vintage Sentiment Tags Clear Stamps, SVG Applique Flowers & Vintage Sentiment Tags Digital Cut File Download, Burlap Cling Background Stamp and Vintage Tag Dies.

Other Supplies: Neenah Natural White and Brown Cardstock, Ranger Distress Inks, Spectrum Noir Markers, Embossing Folder, Brown Seam Binding Ribbon.


Be sure to visit the JustRite Papercraft Blog and the links below for more inspiration:
Thanks for visiting! Hugs!

Marisa