Tuesday, August 26, 2014

Heartfelt Creations Baby Flower Basket

Hello Friends!
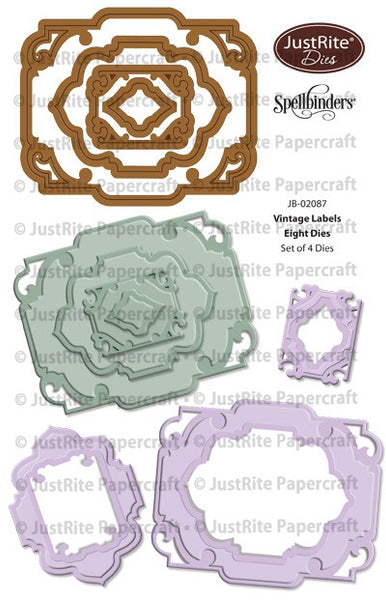
I love making paper boxes and baskets, they are great for small presents or you can fill them up with candy. Today I have this baby basket to share with you. I used Heartfelt Creations papers and cutting dies. For the basket base I used Spellbinders Hexagon Petal Envelope die.


Heartfelt Creations Products:


Other Products Used:

Metallic Cardstock in white, Pink, Yellow and Green, SpellbindersHexagon Petal Envelope Die, Ranger Distress Ink, Viva Pearl Pen, Foam Squares.

Project Instructions:

For the basket base, die cut and emboss Spellbinders Hexagon Petal Envelope die with Sweet Lullaby Paper Collection. Color edges with distress ink. Fold petals up at creasing line.
Cut small images from the Sweet Lullaby paper collection, mat with pink metallic cardstock and attach to each side of basket with foam squares.
Die cut multiple flowers and leaves with Sweet Lullaby, Layered Scalloped Posy and Cut, Mat, Create, Set 2A using metallic cardstock.  Shape flowers and use Pearl Pen to make pearls in the center of small yellow flowers.  Attach flowers and leaves to each corner with glue or strong tape securing the sides together to form basket.
Die cut 3 doilies from Raindrops on Roses die set with white metallic cardstock. Cut in half and glue under basket base.  Glue small flowers and leaves around basket.
For the handle die cut 3 leaf vines from the Sweet Juliet die set. Glue pieces together to make handle.  Attach flowers to the handle and then glue to basket. 

Be sure to visit the Heartfelt Creations Blog for more inspiration.


Thanks for visiting! Hugs!

Marisa


Tuesday, August 12, 2014

Heartfelt Creations August Release - Believe in the Magic of Christmas

Hello Friends!
The Heartfelt Creations 2014 Festive Christmas Collection has JUST RELEASED. Warm shining candles, cozy Bethlehem scenes, script ornaments and doves as elegant and peaceful as a snowy Christmas evening capture the elegance, festivity and real meaning that Christmas is about. But the best thing of it all is that there’s something for everyone in this collection. There are limited quantities available!! Get the Festive Christmas Collection Here.


Believe in the Magic of Christmas Card

Products Used:


Other Products:

Kraft Cardstock, Neenah Paper White Cardstock, White Metallic Cardstock, Ranger Distress Ink Pads, Memento Tuxedo Black Ink Pad, Red Pearls, Hemp Cord.


Project Instructions:

To make a Stair Step  Fold Card base follow instructions HERE. Cover panels using Festive Christmas Paper Collection. For the back panel, use one of the Christmas squares from the paper collection, mat with kraft cardstock, stamp sentiment from the Holly Berry stamp set with black ink and then adhere panel to the back stair step of card.
Stamp Holly Berry leaves with black ink on white paper and die cut with coordinating die from the  Ornamental Add On die set. Die cut 2 decorative lattice pieces from the same die set. Adhere leaves and lattice pieces to card as shown.
Stamp Christmas Poinsettias with black ink on white cardstock and die cut with coordinating Sun Kissed Fleur die. Color flowers with Distress ink, shape and adhere to card on top of leaves. Embellish center of flowers with red pearls.
Using Luggage and Tags die, die cut several of the tags and tickets from the paper collection. Adhere to card using foam squares. Cut small square images from the paper collection, mat with kraft cardstock and adhere to front of card as pictured. 


Be sure to visit the Heartfelt Creations Blog for more inspiration.


Thanks for visiting! Hugs!

Marisa


Thursday, August 7, 2014

JustRite Papercraft August Release - Sympathy Vintage Labels Eight and Nine

Hello Friends!
Welcome to the last day of the JustRite Papercraft August Release. Today we are showcasing Sympathy Vintage Labels Eight and Nine Clear Stamps. This is another beautiful set of 19 clear stamps and the flower labels in this set coordinate with Vintage Labels Eight Dies as you can see in the tag I created with both sets.


  Sympathy Vintage Labels Eight Clear Stamps   Vintage Labels Eight Dies


To make this tag, I started by die cutting the tag base using the largest die from Vintage Labels Eight Dies with designer cardstock. I added 2 decorative corners to both ends which were die cut with Spellbinders Parisian Accents.
I stamped flower frame from Sympathy Vintage Labels Eight and Nine Clear Stamps with black ink onto tag. I colored the flowers with Spectrum Noir Markers.
I stamped smaller flower frame with black ink on designer cardstock and die cut with coordinating die. I colored the flowers, added some distress ink to the edges and adhered to tag with foam squares.
The flowers and leaves were die cut with Spellbinders Rose Creation, Blooms One, Blooms Four and Sprigs.
I added some pearls to the corners of the tag and flowers. For the bow I used seam binding ribbon.


Supplies:

JustRite Papercraft: Sympathy Vintage Labels Eight and Nine Clear StampsVintage Labels Eight Dies.

Spellbinders Dies: Parisian AccentsRose CreationBlooms OneBlooms Four and Sprigs.

Other Supplies: Prima Art Journal Pad Cardstock, Memento Tuxedo Black Ink Pad, Ranger Distress Ink Pads, Spectrum Noir Markers, Rhinestones, Pearls, Seam Binding Ribbon.


Be sure to visit the links below for more inspiration from the design team.


Thanks for visiting! Hugs!

Marisa


Wednesday, August 6, 2014

JustRite Papercraft August Release - Celebrations Sentiments

Hello Friends!
Today is Day Three of the JustRite Papercraft August Release. For my card I used a beautiful new set  called Celebrations Sentiments Clear Stamps. This set has 28 clear stamps that are great for every special occasion.


Celebrations Sentiments Clear Stamps


For my card today, I decided to make an Easel Card. For instructions on how to make an Easel Card go HERE. You can adjust the measurements according to the dies that you are using. My card size is 4 3/8" x 6 1/4" when folded flat.  
I used brown cardstock to make the Easel Card base. I covered the front panel and inside panel with designer cardstock in light brown. 
I die cut and embossed 2 decorative rectangle pieces using Creative Expressions Craft Dies by Sue Wilson, Spanish Collection - Granada Die Set. I colored the edges and embossed areas with distress ink and adhered to card using foam squares. 
I stamped the sentiments from Celebrations Sentiments Clear Stamps with brown ink on natural white cardstock, die cut sentiments with smallest rectangle from the Granada die set and adhered to card with foam squares.
The flowers and leaves were die cut with Spellbinders Rose Creations, Foliage, Sprigs. The flowers were embellished with pearls and rhinestones. I used silk ribbon to make the bow. 


Supplies:

JustRite Papercraft: Celebrations Sentiments Clear Stamps.

Spellbinders Dies: Rose Creations, Foliage, Sprigs.

Other Supplies: Creative Expressions Craft Dies by Sue Wilson, Spanish Collection - Granada Die Set. Neenah Paper Brown and Natural White Cardstock, Memento Rich Cocoa Ink Pad, Ranger Distress Ink Pads, Pearls, Rhinestones, Silk Ribbon. 


Be sure to visit the links below for more inspiration from the Design Team.

Marisa Job (here)


Thanks for visiting!

Marisa


Tuesday, August 5, 2014

JustRite Papercraft August Release - Vintage Fan and Sentiments

Hello Friends,
Welcome to Day Two of the JustRite Papercraft August Release. For my card I used the new beautiful set called Vintage Fan and Sentiments. This set also coordinates with Vintage Fan Dies which was introduced last month.


 Vintage Fan and Sentiments Clear Stamps      Vintage Fan Dies


For my card base I decided to make a Center Step Card with kraft cardstock. For instructions on how to make this card go HERE.
I stamped JustRite Cornflower Damask Background Stamp with brown ink onto natural white cardstock. I then cut panels to fit card base.
The fan image from Vintage Fan and Sentiments was also stamped with brown ink and die cut with coordinating Vintage Fan Dies. I colored the 5 fan pieces with Spectrum Noir markers, glued pieces together with foam squares and ribbon and attached to card.
For the sentiment I used Vintage Fan and Sentiments and Vintage Labels Nine Dies.
The flowers and leaves were die cut with Spellbinders Bitty Blossoms and Sprigs. The decorative pieces behind the flowers were die cut with SB Gold Elements One.


Supplies:

JustRite Papercraft: Vintage Fan and SentimentsVintage Fan DiesCornflower Damask Background Stamp.

Spellbinders Dies:  Gold Elements OneBitty Blossoms and Sprigs.

Other Supplies: Kraft Cardstock, Neenah Paper Natural White, Memento Rich Cocoa Ink Pad, Ranger Distress Ink Pads, Spectrum Noir Markers, Seam Binding Ribbon.

Be sure to visit the links below for more inspiration from the Design Team.


Thanks for visiting! Hugs!

Marisa


Monday, August 4, 2014

JustRite Papercraft August Release - Hope and Love Vintage Labels

Hello Friends!
Welcome to Day One of the JustRite Papercraft August Release. Today I'm showcasing 2 beautiful sets called Hope and Love Vintage Labels Eight and Nine Clear Stamps and Ironworks Vintage Labels Eight Cling Background Stamp.


I started my card by making a 5" x 7" card base with kraft cardstock. The next layer was die cut and embossed with Spellbinders Exquisite Labels Eleven largest die in black cardstock. 
I stamped Ironworks Vintage Labels Eight Cling Background Stamp with black ink on designer paper and adhered to card. The sentiment from Hope and Love Vintage Labels Eight and Nine Clear Stamps was stamped with black ink and die cut with coordinating Vintage Labels Eight Dies. I used distress inks and Spectrum Noir markers to color image. 
The flowers and leaves were die cut with Blooms Four, Blooms Three, Sprigs, Corner Sprigs. I embellished the center of flowers with bronze goosebumps rhinestones.


Supplies:


Other Supplies: Kraft and Black Cardstock, Designer Cardstock, Tuxedo Black Memento Ink, Ranger Distress Inks, Spectrum Noir Markers, Twinkle Goosebumps. 


Be sure to visit the links below for more inspirations from the JustRite Design Team. 

Marisa Job (here)


Thanks for visiting! Hugs!

Marisa