Tuesday, December 31, 2013

Heartfelt Creations Special Wishes Gift Bag

Hello Friends,
Happy New Year 2014!!! I hope you had a wonderful Holiday Season! We had a great Christmas with family, friends, and lots of good food!!
My project for today is a gift bag using Heartfelt Creations beautiful papers, stamps and die templates. I hope it inspires you to make one too, they are really simple to make.


Heartfelt Creations Products and Products Carried by HC:


Other Products Used:

Neenah Paper Natural White Cardstock, Bronze Metallic Carstock, Ranger Distress Ink Pads, Memento Tuxedo Black Ink Pad, May Arts Silk Ribbon, Foam Squares, Paper Lunch Bag.

Project Instructions:

Cover lunch paper bag with Floral Key Paper Collection. Cut out Special Wishes tag from Floral Key paper and attach to paper bag with foam squares.
Die cut 2 Decorative Lattice Swirls from Timeless Amour die set with bronze metallic paper. Glue to top of bag on both sides, front and back. Punch 2 holes for ribbon to go through and tie a bow to close bag.

Stamp Mini Vintage Floret with black ink onto natural white cardstock and die cut with coordinating dies from Vintage Floret die set. Color flowers and leaves with distress inks. Shape and layer petals to form flower. Attach flower and leaves to bag using glue.

Be sure to visit the Heartfelt Creations Blog for more inspiration.

Thanks for visiting! Hugs!

Marisa

Tuesday, December 17, 2013

Heartfelt Creations Wednesday - Floral Key Card

Hello Friends!
Welcome to another Wednesday with Heartfelt Creations. Here is my card I created using Heartfelt Creations wonderful products. 


Heartfelt Creations Products and Products Carried by HC:


Other Products Used:

Spellbinders Marvelous Squares Die Set, Neenah Paper Natural White Cardstock, Pearl Metallic Cardstock, Memento Tuxedo Black Ink, Ranger Distress Inks, Brad, Pink Seam Binding Ribbon.

Project Instructions:

The card size for this project is 6 ¼” x 6 ¼”.  Cut a 6” x 6” piece using Floral Key Paper Collection, distress edges and adhere to card. Cut another piece measuring  5 ¼” x  5 ¼”, distress edges and adhere to card. Using Spellbinders Marvelous Squares, die cut largest square and adhere to card using foam squares. Using pearl metallic cardstock, die cut 2 Marvelous Squares and 8 corners. Adhere to card as pictured using foam squares.
Stamp Vintage Floret flowers on natural white cardstock with black ink, die cut with coordinating Vintage Floret die. Color with distress inks, shape petals and attach to card center using foam squares. Die cut smaller Sweet Juliet flower, color and assemble with a brad. Glue Sweet Juliet flower to center of flower.
Stamp Open Leaf and die cut with coordinating Classic Leaf die. Color leaves with distress ink, shape and glue under flower.
Stamp Burnished Key with black ink, die cut with Burnished Key die. Color small key and Love lock and attach to center of bow.

Be sure to visit the Heartfelt Creations Blog for more inspiration.


Thanks for visiting! Hugs! 

Marisa

Tuesday, December 10, 2013

Hearfelt Creations Wednesday - Your Destiny is in the Journey Card

Hello Friends!!
I have another card to share with you using Heartfelt Creations stamps, dies and paper. I love how everything coordinates, it makes it easier to create a project.


Heartfelt Creations Products Carried by HC:


Other Products Used:

Neenah Papers Natural White and Sand Cardstock, Memento Black Tuxedo Ink, Rangers Distress Ink, Copic Markers, Small Beads, Foam Squares, Glue.

Project Instructions:

The card size for this project is 6” x 6”.  Using Floral Key Paper Collection cut 4 panels measuring  6”, 5 ½”, 5” and 4 ½”. Mat panels with sand cardstock adding about  1/8” when cutting. Adhere to card as pictured.
Stamp key from Journey of Love Keys PreCut set on front panel with black ink, color with Copic Markers.
Stamp heart on natural white cardstock with black ink, color with Copic Markers. Die cut heart from Timeless  Amour Die, glue on stamped heart and adhere to card using foam squares.
Stamp leaves using Classic Leaf and Open Leaf PreCut Sets, die cut with coordinating Classic Leaf Die. Shape leaves and attach to card using foam squares.
Stamp Sun Kissed Fleur flowers with pink ink on designer paper and die cut with coordinating Sun Kissed Fleur Die.  Shape flowers and glue to card on top of leaves.

Be sure to visit the Heartfelt Creations Blog for more inspiration.


Thanks for visiting! Hugs!

Marisa


Saturday, December 7, 2013

JustRite Papercraft December Release - Elegant Celebrations Clear Stamps

Hello Friends!
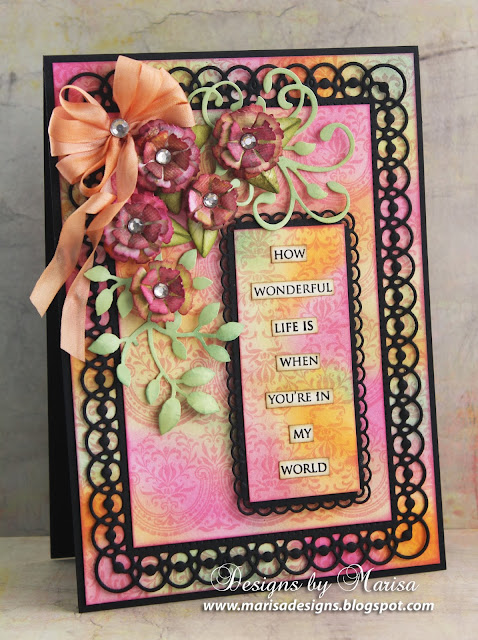
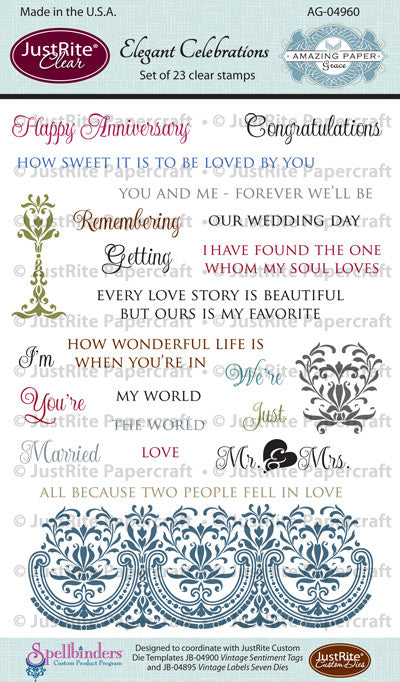
Welcome to the last day of the JustRite Papercraft December Release. Today we have a gorgeous set to share with you designed by Becca Feeken,  it is called Elegant Celebrations Clear Stamps. This set has 23 clear stamps.


The card size for this project is 5" x 7". I created my own background panels by using Pan Pastels on natural white cardstock. Next I stamped the scalloped border from Elegant Celebrations Clear Stamps with pink ink onto the colored cardstock.
The black frames were die cut with Spellbinders 5" x 7" Detailed Scallops. I stamped the sentiment with black ink onto natural white cardstock, I cut out each word and glued to frame and then onto the card using foam squares. 
The flowers were die cut with Spellbinders Carnation Creations and the leaves with Sprigs.
I used silk ribbon for the bow and rhinestones for the flower centers.

Supplies:

JustRite Papercraft: Elegant Celebrations Clear Stamps
Other Supplies: Neenah Papers Black and Natural White Cardstock, Memento Tuxedo Black Ink, Rangers Distress Inks, Color Box Chalk Pink Pastel, Pan Pastels Artists Pastels, Rhinestones, May Arts Silk Ribbon.


Be sure to visit the JustRite Papercraft designers below to see their beautiful creations.


Marisa Job (here)


Thanks for visiting! Hugs!

Marisa

Friday, December 6, 2013

JustRite Papercraft December Release - Just a Note Vintage Sentiment Tags

Hello Friends!
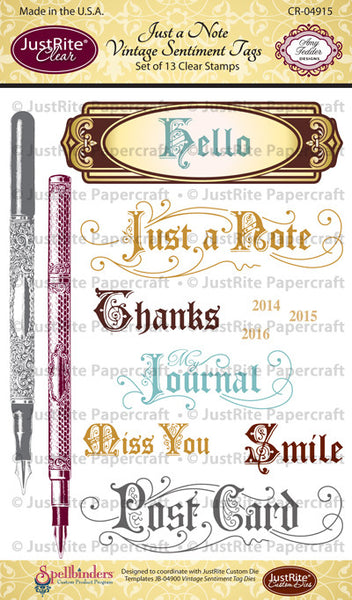
Welcome to day four of the JustRite Papercraft December Release. Today we have two beautiful sets to share with you, Just a Note Vintage Sentiment Tags and coordinating dies called Vintage Sentiment Tag Dies.


Just a Note Vintage Sentiment Tag Clear Stamps      Vintage Sentiment Tag Dies


My tag for this project is about 3 3/4" x 7". I covered the tag base with designer paper. Next I die cut 2 pieces with Heirloom Flourish One Die (sneak peak of tomorrow's die release), and adhered them to top and bottom of tag.
I stamped the sentiment and pretty frame from Just a Note Vintage Sentiment Tags on natural white cardstock with brown Memento ink. I die cut sentiment with coordinating die from Vintage Sentiment Tag Dies and attached to tag using foam squares.
The flowers were die cut with Spellbinders Blooms One, Blooms Three, Blooms Four. For the leaves I used Spellbinders Sprigs and for the doily under the flower I used Medallion Four.


Products:

JustRite Papercraft: Just a Note Vintage Sentiment TagsVintage Sentiment Tag DiesHeirloom Flourish One Die.
Spellbinders: Blooms OneBlooms ThreeBlooms FourSprigsMedallion Four.
Other Products: Authentique Cherish Paper Collection, Neenah Natural White Cardstock, Memento Rich Cocoa Ink, Rangers Distress Ink Pads, Stickles, Rhinestones, Seam Binding Ribbon.

Here are the other JustRite Papercraft designers also showcasing beautiful projects using today's new releases.

JustRite Inspiration


Thanks for visiting! Hugs!

Marisa

Thursday, December 5, 2013

JustRite Papercraft December Release - Grand Thank You Cling Stamps

Hello Friends!
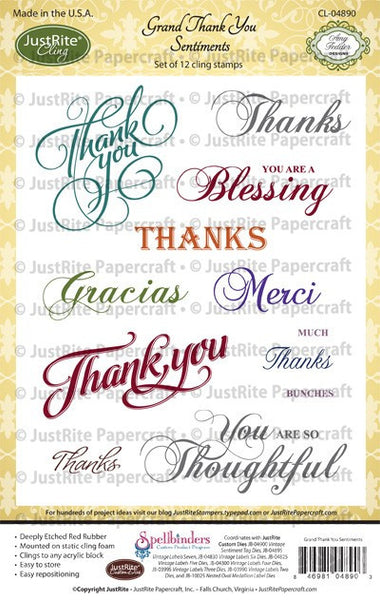
Welcome to day three of the JustRite Papercraft December Release. Today we have a beautiful set of 12 cling stamps to share with you called Grand Thank You Cling Stamps. I decided to make an easel card to showcase the Thank You sentiment on the front of the card and You Are a Blessing inside the card.


Grand Thank You Cling Stamps    Vintage Sentiment Tag Dies


Instructions:

1. Cut a double sided 12" x 12' designer cardstock in half to 6" x 12".
2. Score at 3" and 6", fold card to make a 6" x 6" card base.
3. Die cut two of the largest Spellbinders Gold Majestic Circles using designer cardstock. Stamp Thank You sentiment from the Grand Thank You Cling Stamp set with black ink. Glue both pieces together and adhere to lower half of the card front below the score line and fold to make the easel.
4. Stamp You Are a Blessing on designer cardstock and die cut with the largest die from the Vintage Sentiment Tag Dies set. Adhere to inside of the card using foam squares. This is also where the easel fold will rest.
5. Die cut flowers using Spellbinders Rose Creations and natural white cardstock. Color edges with distress ink, shape and layer to form flowers. Glue to card as pictured. 
6. Die cut leaves and swirls with Spellbinders Sprigs and natural white cardstock. Color leaves and swirls with distress inks and glue to card under flowers.
7. Make a ribbon with seam binding ribbon and attach to card. 

Supplies:

Spellbinders Dies:  Gold Majestic Circles, Rose CreationsSprigs
Other Supplies: Prima Marketing Firefly Paper Collection, Neenah Papers Natural White, Rangers Distress Inks, Foam Squares, Seam Binding Ribbon from The Stamp Simply Ribbon Store.

Be sure to visit the following links to see the beautiful projects the JustRite Papercraft design team members have created.


Thanks for visiting! Hugs!

Marisa


Tuesday, December 3, 2013

Heartfelt Creations Wednesday - Especially For You Center Easel Card

Hello Friends!
I created this card with Heartfelt Creations Floral Key Collection. This collection has beautiful stamps, die templates and papers that I loved from the first time I saw it.


Heartfelt Creations Products and Products Carried by HC:

Spellbinders Grand Calibur

Other Products Used:
Neenah Papers Cardstock (Natural White and Brown), Metallic Cardstock (Pearl), Ranger Distress Ink Pads (Peeled Paint, Victorian Velvet, Frayed Burlap), Memento Ink Pad (Black Tuxedo), May Arts Silk Ribbon (Pink), Pink Pearl Brad, White Pearl, Foam Squares, Glue Gun.

Project Instructions:
The card size for this project is  5 ½” x  8 ½”. To make cardbase, fold 8 ½” x 11” pearl metallic cardstock in half. Cut to the center fold line at 2 1/8” in from each side. Fold center panel in half to form the easel. Glue the two side panels to bottom of card.
Cut a card panel from Floral Key Paper Collection, mat with brown cardstock and adhere to center of card by gluing the bottom half only. Cover the side panels with Floral Key Paper Collection.
Stamp Burnished Key on natural white cardstock with black ink, die cut with coordinating Burnished Key Die. Color some of the keys with 3D Stamp Paint and distress inks.
Stamp Vintage Floret flowers and die cut with coordinating Vintage Floret die. Color with distress inks, shape petals and adhere to card. Stamp Open Leaf and die cut with coordinating Classic Leaf die. Color with distress ink and glue to card under flower.
Cover center of card under easel with Floral Key Paper Collection. Adhere decorative frame to bottom half using foam squares.
Make a bow with silk ribbon, glue to card center. Apply keys to ribbon and card as pictured. 

Be sure to visit the Heartfelt Creations Blog for more inspiration.

Thanks for visiting! Hugs!

Marisa

JustRite Papercraft December Release - Time Flies Cling Background Stamp

Hello Friends!
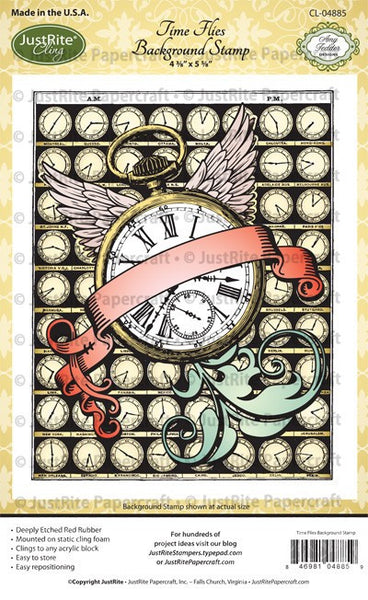
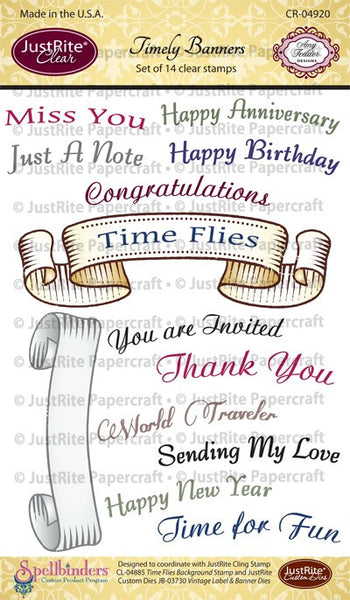
Welcome to the first day of the JustRite Papercraft December Release. We have two beautiful sets to share with you, Time Flies Cling Background Stamp and Timeley Banners Clear Stamps, a set of 14 clear stamps.


    Time Flies Cling Background Stamp          Timely Banners Clear Stamps


The card size for this project is 5 1/4" x 7 1/4". I used Spellbinders M-Bossabilities Ornamental Iron to emboss brown cardstock and then colored lightly with distress inks.
 I used brown ink to stamp Time Flies Background onto natural white cardstock and then adhered to card using foam squares.
 I stamped the banner and sentiment with brown ink onto natural white cardstock and colored with Copic markers.
The flowers were die cut with Spellbinders Rose Creations. For the leaves I used Foliage and for the swirls I used Sprigs.

Supplies:

JustRite Papercraft: Time Flies Cling Background Stamp and Timeley Banners Clear Stamps
Spellbinders: M-Bossabilities Ornamental IronRose CreationsFoliageSprigs
Other Supplies: Neenah Papers Natural White, Brown and Sand Cardstock, Memento Rich Cocoa Ink Pad, Rangers Distress Inks, Copic Markers.

Be sure to visit the links below to see the beautiful projects the JustRite Papercraft Design Team members have created with these 2 sets.

Marisa Job (here)

Thanks for visiting! Hugs

Marisa