Tuesday, February 24, 2015

Heartfelt Creations - Wishing You the Best Card

Hello Friends,
Welcome to Heartfelt Creations Wednesday.Today I have a card created with Heartfelt Creations rubber stamps, dies and papers. I love how they coordinate with each other.


Products Used:


Other Products:

Neenah Papers in Natural White Cardstock, Orange, Green and Lavender Cardstock, Ranger Distress Ink Pads: Peeled Paint, Picked Raspberry, Spiced Marmalade; Color Box Chalk: Chestnut Roan; Foam Squares, Orange Silk Ribbon, Spellbinders Grand Calibur, Hot Glue Gun.

Project Instructions:

Cut orange cardstock to 6” x 12”, fold in half to make a 6” x 6” card base.  Cut lavender cardstock to 5 ¾” x 5 ¾”, distress edges and adhere to card base. Cut another layer to 5 ½” x 5 ½” with paper collection, distress edges and adhere to card. Die cut lattice piece from Raindrops on Roses die set with natural white cardstock, cut in half and glue under lavender layer.
Using paper collection cut out 2 tags and several tickets using coordinating dies from Luggage and Tags die set, adhere to card with foam squares.
Stamp Botanical Rose on natural white cardstock with brown chalk ink, die cut with Botanical Wings Die. Color flowers and leaves with distress inks and shape with tool kit. Embellish flower centers with orange Prills.
Die cut large vine from Cut Mat Create Die set with green cardstock. Arrange flowers, leaves and vine on card and glue with hot glue.
Stamp Butterfly Medley on natural white cardstock with brown chalk ink, die cut with Butterfly Medley die. Color one of the butterflies with distress inks and adhere to card with foam squares.
Add orange silk ribbon to both tags.

Be sure to visit Heartfelt Creations Blog for more Inspiration.


Thanks for visiting! Hugs!


Marisa


Tuesday, February 10, 2015

Heartfelt Creations February Release - Butterfly Medley Collection

Hello Friends,
Are you longing for springtime...dreaming of sunny hours spent in a lavish flower garden where butterflies flit lazily from blossom to blossom? Heartfelt Creations invites you to revel in the beauty of springtime with the release of the Butterfly Medley Collection of stamps, dies, and papers. This uplifting collection is bursting with bountiful botanical roses and a kaleidoscope of fanciful butterflies. Soft shades of pastel peach, lilac, sage, lemon, teal and pink are the perfect counterpoint for the bleak, grey days of mid-winter. Beautifully landscaped backgrounds include pastel plaids, cheery polka-dots, flowing script, classic stripes, elegant flourishes, seed packets, garden themed sentiments and images. Six hand drawn stamp sets featuring botanical roses and butterflies can be paired with two sets of dies, allowing you to stamp and die cut a host of embellishments with a single pass through your die cutting machine. You'll dream in beauty, plant seeds of encouragement and reap a harvest of creativity when you design with the Butterfly Medley Collection from Heartfelt Creations.


Botanical Roses Card

Heartfelt Creations Products:


Other Products Used:

Neenah Papers Solar White Cardstock, Gold Metallic Cardstock, Spellbinders Bow Elegance Die Set, Memento Tuxedo Black Ink Pad, Tsukineko Delicata Golden Glitz Pigment Ink, Rangers Distress Ink (Dusty Concord, Peeled Paint), Gold Sheer Ribbon, Foam Squares.


Project Instructions:

The card size is 5” x  7”. Cut gold metallic cardstock to 7” x 10”, fold in half to make card base.  Cover card base front with Butterfly Medley paper collection.
Die cut Spellbinders Bow Elegance with white cardstock, color with Dusty Concord distress ink and adhere to card with foam squares.
Using paper collection, cut a 3” x 4 ¾” piece, distress edges and color with gold pigment ink. Stamp Botanical Rose Bouquet with black ink, color leaves with Peeled Paint distress ink and buds with gold pigment ink. Adhere to card with foam squares.
Stamp flowers and leaves with Botanical Rose on white cardstock with gold pigment ink. Die cut with coordinating Botanical Wings Die. Color petal borders with gold pigment ink, shape petals and layer to form roses. Color leaves with Peeled Paint distress ink.
Die cut several small vine pieces in gold metallic cardstock. Glue flowers, leaves and vine on card as shown.

Make a bow with gold sheer ribbon and glue to card next to flowers. 

Be sure to visit the Heartfelt Creations Blog for more inspiration.


Thanks for visiting! Hugs!

Marisa


Monday, February 9, 2015

JustRite Papercraft February Release - Best Wishes

Hello Friends,
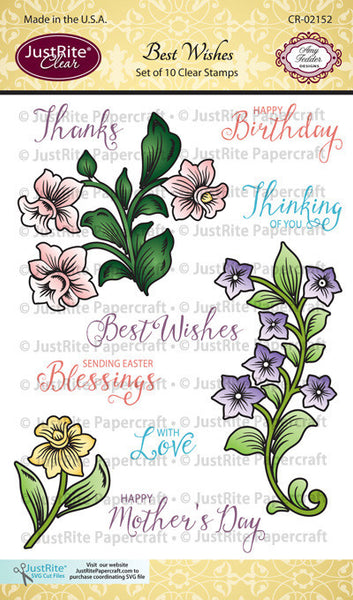
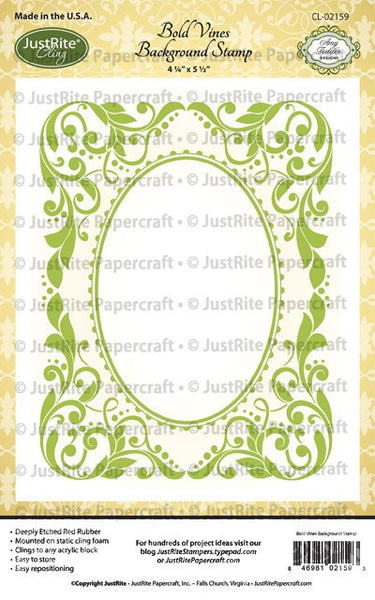
Today is the last day of the JustRite Papercraft February Release. For my card I used a beautiful new set of 10 clear stamps called Best Wishes Clear Stamps and coordinating Best Wishes Digital Cut SVG Filefor the background I used Bold Vines Background Stamp.   


   Best Wishes Clear Stamps       Best Wishes Clear Stamps


  Bold Vines Cling Background Stamp


I started by making a 6" x 5" card base using kraft cardstock.  I cut a smaller layer in pink cardstock and adhered to card base. 
I stamped Bold Vines Background Stamp on designer cardstock with Versamark and white embossing powder and then heat set. The sentiment was also stamped with Versamark and white embossing powder. 
For the flowers, I first cut them with Best Wishes Digital Cut SVG File and then stamped the coordinating images on the cuts with Best Wishes Clear Stamps using black ink. I colored the flowers and leaves with distress ink and then adhered to card with foam squares. 
I embellished the center of the flowers with pearls and created a bow with pink silk ribbon. 


Supplies:

Other Supplies: Kraft Cardstock, Neenah Papers Natural White Cardstock, The Paper Studio Poetic Postage Paper Pack, Ranger Distress Inks, Versamark, White Embossing Powder, Heat Gun, Foam Squares, Silk Pink Ribbon. 


Be sure to visit the links below for more inspiration from the Design Team. 


Marisa Job (here)

Thanks for visiting! Hugs!

Marisa


Sunday, February 8, 2015

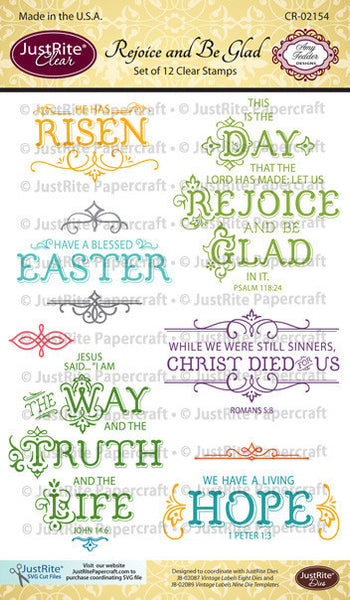
JustRite Papercraft February Release - Rejoice and Be Glad Clear Stamps

Hello Friends,
Welcome to Day Five of the JustRite Papercraft February Release. Today we have 3 beautiful sets to showcase, Rejoice and Be Glad Clear Stamps, Celtic Knot Cling Background Stamp and Wishing You Rainbows Sentiments Clear Stamps. For my card I used one of the sentiments from the set Rejoice and Be Glad Clear Stamps


Rejoice and Be Glad Clear Stamps    Upcycled Woodgrain Cling Background Stamp


To make my 5" x 5" card base I used Craft Dies by Sue Wilson, New York Collection - Madison Square and natural white cardstock. I colored the edges with distress ink. For the next layer I cut a 4" x 4" square using pattern paper. 
The decorative square frame was also die cut with New York Collection - Madison Square and then adhered to card with foam squares. 
I stamped the sentiment from the set Rejoice and Be Glad Clear Stamps with black ink onto natural white cardstock and then cut to 2 1/2" x 2 1/2".  I also stamped Upcycled Woodgrain Background Stamp on sentiment with light brown ink and then glued to card center.
The flowers were die cut with Finishing Touches - Camelia - Complete Petals and the leaves were die cut with Finishing Touches - Mosaic Leaves.


Supplies:


Other Supplies: Neenah Papers Natural White Cardstock, Prima Marketing Time Traveler Collection, White Pearls, Foam Squares. 

Be sure to visit the links below for more inspiration from the Design Team.


Thanks for visiting! Hugs!

Marisa


Friday, February 6, 2015

JustRite Papercraft February Release - Thank You Daffodil Clear Stamp Set

Hello Friends,
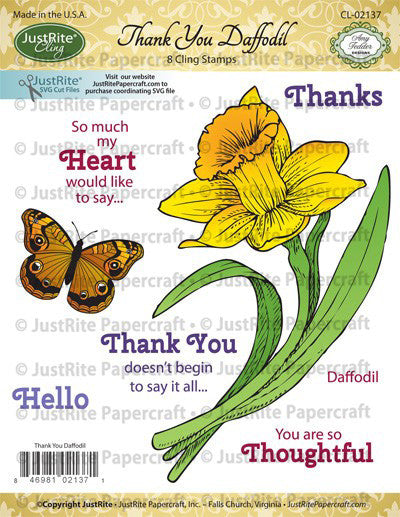
Today is Day Three of the JustRite Papercraft February Release. We have a beautiful set to share with you called Thank You Daffodil Cling Stamps.


Thank You Daffodil Cling Stamps


JustRite Papercraft is having a great sale on all Cling Background stamps and Spectrum Noir Products!!


My card base measures 5" x 7". I cut 2 smaller layers with designer cardstock, distressed edges and adhered to card. 
I stamped Daffodil from the Thank You Daffodil Cling Stamps set with black ink onto natural white cardstock and colored with Spectrum Noir Markers.  I stamped Upcycled Woodgrain Background Stamp on flower background with very light brown ink. The decorative oval frame was die cut with Spellbinders Fleur De Elegance and then adhered to card using foam squares.
The flowers and leaves were die cut with Spellbinders Pretty Petals B, Pretty Petals C and Pretty Petals D using natural white cardstock. I colored the flowers and leaves with distress inks, shaped and adhered to card with glue gun. 
For the bow I used pink silk ribbon.


Supplies:


Other Supplies: Neenah Paper - Natural White Cardstock, Prima Marketing - Art Journal Pad, Ranger Distress Ink Mini Pads, Memento - Black Tuxedo Ink Pad,  Spectrum Noir Markers, pink silk ribbon, pink pearls, foam squares, glue gun.


Be sure to visit the links below for more inspiration from the Design Team.

Thanks for visiting!! Hugs!


Marisa


Thursday, February 5, 2015

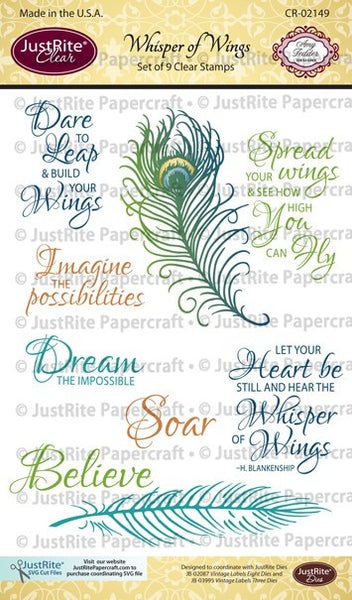
JustRite Papercraft February Release - Whisper of Wings Clear Rubber Stamp

Hello Friends,
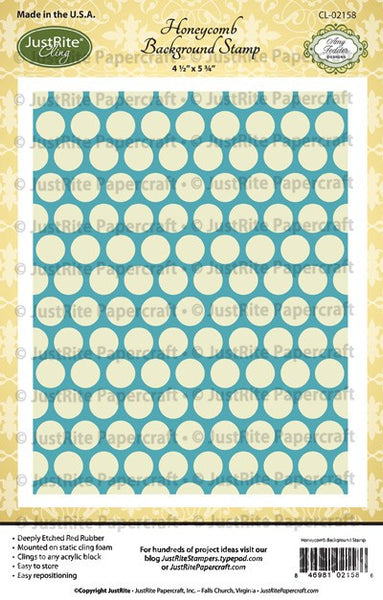
Welcome to Day Two of the JustRite Papercraft February Release. Today we have 2 beautiful sets to showcase, Whisper of Wings Clear Stamps and Honeycomb Background Cling Stamp. I used both sets for my card and I also used Craft Dies by Sue Wilson for the flowers, leaves and decorative frame.


       Honeycomb Cling Background Stamp        Whisper of Wings Clear Stamps


JustRite Papercraft is having a sale on all Cling Background stamps and Spectrum Noir Products!!!


Card Instructions:

1. Cut lavender cardstock to 12" x  4 3/4", fold in half to make a 6" x 4 3/4" card base.
2. Stamp Honeycomb Background Cling Stamp on orange cardstock with Versamark and white embossing powder and heat emboss. Cut background around edges and glue to card base. 
3. Die cut decorative frame with  Scandinavian Collection - Oslo die set using orange and lavender cardstock. Adhere to card with foam squares. 
4. Stamp sentiment from the Whisper of Wings Clear Stamp set on orange cardstock with Versamark and white embossing powder and heat emboss. Die cut around sentiment using Scandinavian Collection - Oslo. Adhere to card with foam squares. 
5. Die cut multiple flowers using Finishing Touches - Camellia - Complete Petals die set. Shape and layer to form flowers. Adhere to card with glue. Embellish center of flowers with white pearls. 
6. Die cut leaves using Finishing Touches - Mosaic Leaves die set. Shape leaves and adhere to card under flowers. 
7. Make bow using peach silk ribbon and adhere to card with glue. 


Supplies:


Other Supplies: BoBunny Cardstock - Double Dot in Lavender, Wasabi Vintage and Coral Vintage; Versamark, white embossing powder, peach silk ribbon, foam squares, white pearls.


Be sure to visit the links below for more inspiration from the Design Team. 


Marisa Job (here)


Thanks for visiting! Hugs!
Marisa