Friday, November 30, 2012

JustRite Papercraft Friday Challenge - Christmas Ornament

Hello Friends!
It is time for another JustRite Papercraft Challenge! JustRite Friday Challenge #087 is "Picture This", they want you to add a picture to your project, it could be a card, layout, mini book, or home decor item. This challenge is sponsored by Spellbinder. For more information and Challenge Rules go to the JustRite Papercraft Blog.


For this challenge I decided to make this Christmas ornament with a picture of my 2 year old grandson. This ornament can also be used as a present tag. 
For the ornament I used Holiday Cheer Ornaments, this is a beautiful set of 8 cling stamps. The image I used coordinates with 2010 Heirloom Ornaments die by Spellbinders. I embossed the image in gold embossing powder, colored with Copic markers and then die cut with coordinating die. I fussy cut the center of the ornament and adhered the picture behind. I die cut a second ornament piece for the back to cover the picture.


     Welcome to Justrite Stampers | Free card making idea with supply lists, scrapbooking and craft ideas with rubber stamps, clear stamps and cling stamps | Secure ordering online. | Ships in 24 hours.    Spellbinders Nestabilities are paper cutting and embossing dies sold in sets They create paper shapes at 1/4th and 1/8th inch increments that help create cards and scrapbooking pages with stunning visual effects. They are universal and work in most die cu

The poinsettia was die cut and embossed with red cardstock using Layered Poinsettia by Spellbinders. I inked the edges and embossed areas with Gold Brilliance ink and embellished the center with white pearls.

Supplies:
JustRite Papercraft: Holiday Cheer Ornaments
Spellbinders: 2010 Heirloom OrnamentsLayered Poinsettia
Other: Beige and Red Cardstock, Gold Embossing Powder, Galaxy Gold Brilliance Ink, Copic Markers, Pearls, Ribbon.

Be sure to visit JustRite Papercraft Blog to see the beautiful creation Designer Team Member Sheri Holt has created.

Thanks for visiting! Hugs!

Marisa

JustRite Papercraft December Release - Love is a Never Ending Story Card

Hello Friends!
Welcome to the last day of the JustRite Papercraft December New Releases. Today we are showcasing Vintage Pearl Labels, this is a beautiful set of 11 cling stamps. This set coordinates with Vintage Label & Banner Dies. For my card I also used Victorian Tile Background Stamp.


                                       Justrite Stampers Papercraft | CL-03980 Vintage Pearl Labels Cling stamps | Cling Stamps made in the USA  | colored storage boards.
 
                     Welcome to Justrite Stampers | Free card making idea with supply lists, scrapbooking and craft ideas with rubber stamps, clear stamps and cling stamps | Secure ordering online. | Ships in 24 hours.          Spellbinders Nestabilities are paper cutting and embossing dies sold in sets They create paper shapes at 1/4th and 1/8th inch increments that help create cards and scrapbooking pages with stunning visual effects. They are universal and work in most die cu

For my card I first stamped Victorian Tile Background Stamp on black cardstock and embossed with gold embossing powder. The Vintage Pearl Label and sentiment were embossed with gold embossing powder on beige cardstock and die cut with coordinating die from Vintage Label & Banner.
The medallions behind the label were die cut with Medallion Four by Spellbinders. The flowers and leaves were die cut with Bitty Blossoms and Foliage Two by Spellbinders.
I also embellished the background with white pearls.

Supplies:
JustRite Papercraft: Vintage Pearl LabelsVictorian Tile Background StampVintage Label & Banner Dies
Spellbinders:  Medallion FourBitty Blossoms and Foliage Two
Other: Black and Beige Cardstock, Gold Embossing Powder, Embossing Ink, White Pearls, Distress Ink.

Be sure to visit the JustRite Papercraft Blog and the other Designer Team Members to see their wonderful creations.

Marisa Job (here)
Michele Kovack


Thanks for Visiting! Hugs!

Marisa


Thursday, November 29, 2012

JustRite Papercraft December Release - To my Forever Friend Tag

Hello Friends!!
Welcome to day three of the JustRite Papercraft December Release. Today we are showcasing 2 beautiful stamps, Antique Valentine Tags One, a set of 19 clear stamps, and Victorian Tile Background. For my tag I decided to use Antique Valentine Tags One and for the background I used Elegant Damask Background which was showcased yesterday.


             Welcome to Justrite Stampers | Free card making idea with supply lists, scrapbooking and craft ideas with rubber stamps, clear stamps and cling stamps | Secure ordering online. | Ships in 24 hours.              Welcome to Justrite Stampers | Free card making idea with supply lists, scrapbooking and craft ideas with rubber stamps, clear stamps and cling stamps | Secure ordering online. | Ships in 24 hours.   

Instructions:
1. Stamp Elegant Damask Background on tag with distress ink and emboss with clear embossing powder.
2. Stamp sentiment from Antique Valentine Tags One and die cut with coordinating Antique Tags One Dies.
3. Die cut medallion, adhere behind sentiment and then onto tag.
4. Die cut flowers and leaves, ink edges with Distress inks, shape flowers and adhere to tag as pictured.
5. Make a bow with seam binding ribbon and attach to tag.
6. Embellish tag with pearl swirls.

Supplies:
JustRite Papercraft: Antique Valentine Tags OneElegant Damask Background, Antique Tags One Dies
Spellbinders: Medallion Four D-Lites, Rose Creations, Bitty Blossoms, Foliage, Foliage Two
Other: Beige Cardstock, Tuxedo Black Memento Ink, Distress Inks by Rangers, Ribbon from The Stamp Simply Ribbon Store, Prima Pearl Swirls.

Be sure to visit the other Design Team Members to see their beautiful creations:


Thanks for Visiting! Hugs!

Marisa

Tuesday, November 27, 2012

Heartfelt Creations Wednesday - Candy Basket

Hello Friends!
Welcome back to another Heartfelt Creations Wednesday! Today I would like to share with you this candy basket I created using the beautiful Timeless Amour Collection and Vintage Floret stamps and coordinating dies. The basket is really simple to make with the Hexagon Petal Envelope Die by Spellbinders. I designed this envelope die for them last year, you can make an envelope and a basket with the same die.


Supplies Used:

Other Supplies:
Hexagon Petal Envelope Die by Spellbinders, Rich Cocoa Memento Ink by Tsukineko, Vintage Photo and Victorian Velvet Distress Inks by Rangers, Bronze Pearls by Queen & Co, Glossy Accents, Hershey’s Nuggets.

Instructions:
Die cut and emboss basket base with Timeless Amour Collection using Hexagon Petal Envelope Die by Spellbinders and run through the Grand Calibur machine. 


Trace side petals using the die onto Designer Paper and cut with scissors. I traced and cut 12 petals to cover the inside and outside of the basket. Adhere Designer Paper petals to Hexagon Petal Envelope and fold petals at crease.


Stamp and die cut multiple flowers and leaves with Designer Paper using the Vintage Floret Collection of rubber stamps and dies. You need enough flowers to make 6 clusters for each side of the basket and more clusters for the handle. Shape the petals and leaves, add distress ink to edges, then layer the petals with glue to form the flowers and embellish with pearls. Attach flower clusters to each corner with glue or strong tape securing the sides together to form the basket as picture shows.
For the handle, cut a strip 10” x 1” with Designer Paper, ink edges with distress ink. Arrange flowers and leaves on the handle and attach to basket with strong tape or glue.


For sentiment, die cut 2 small hearts from Timeless Amour die set and glue together with a piece of ribbon in the middle. Stamp sentiment with brown ink, cut out words and glue on heart. Attach heart to handle as shown. Add a small flower on the heart.
For the candy, wrap each candy with strips of Designer Paper measuring 1” x 3” and secure with tape.

Be sure to visit the Heartfelt Creations Blog to see more projects created by the Design Team Members.

Thanks for visiting! Hugs!

Marisa


JustRite Papercraft December Release - Happy Valentine's Day Card

Hello Friends!
Today, is day one of the December Release for JustRite Papercraft and the stamp set we are showcasing today is Cupid Background Stamp. I love this background stamp, you can make a card in minutes. For my card I also used Hugs & Kisses Sentiments which will be showcased tomorrow by our design team.


Welcome to Justrite Stampers | Free card making idea with supply lists, scrapbooking and craft ideas with rubber stamps, clear stamps and cling stamps | Secure ordering online. | Ships in 24 hours.       Justrite Papercrafts| CR-04340 Hugs & Kisses clear stamps | Clear Stamps made in USA| Valentine & Mother's Day Stamps

For my card I stamped Cupid Background Stamp using embossing ink and black embossing powder. I colored the image with Copic markers and then distressed it with Photo Vintage distress ink. The sentiments from Hugs & Kisses Sentiments stamp set were stamped with black ink.
For the black trim on top and bottom, I used Flourish Trim D-Lites die by Spellbinders. The flowers and leaves were die cut with Bitty Blossoms by Spellbinders.
The seam binding ribbon is from The Stamp Simply Ribbon Store, where you can find a great variety of beautiful ribbons.

Supplies:
JustRite Papercraft: Cupid Background StampHugs & Kisses Sentiments
Spellbinders: Flourish Trim D-LitesBitty Blossoms
Other: Ribbon from The Stamp Simply Ribbon Store, Black and Beige Cardstock, Embossing Ink, Black Embossing Powder, Copic Markers, Distress Inks, Pearl.

Be sure to visit the other Design Team Member to see their beautiful creations using the Cupid Background Stamp.


Thanks for visiting! Hugs!


Marisa


Friday, November 23, 2012

Heartfelt Creations November Release - Pocket Card & Tag

Hello Friends!
We are pleased to introduce the Timeless Amour CollectionGrab your cup of cocoa and snuggle up. This set is as warm and romantic as the days when the snow flies and the fireplaces pops. Typography of love, roses of delight, and patterns of mesmerizing drama are all included in the Timeless Amour Collection. There are 5 new PreCut Stamp Sets, one 12x12 Paper Collection, and one beautiful new exclusive Spellbinders die designed for Heartfelt Creations. Leave a comment on the Heartfelt Creations Blog by November 27th and you will be eligible to win the entire release valued at $134.93. 


Supplies Used:

Other Supplies:
A2 Matting Basics A and A2 Matting Basics B Die Sets by Spellbinders, Bronze Metallic Cardstock by Stardream, Natural White Cardstock by Neenah Papers, Rich Cocoa Memento Ink by Tsukineko, Copic Markers: RV95, RV69, YG95, YG99, Brushed Corduroy and Victorian Velvet Distress Ink by Ranger, Bronze Pearls by Queen & Co, Seam Binding Ribbon, Foam Squares by Scrapbook Adhesive by 3L.

Instructions:
Cut a piece of bronze metallic cardstock to 4 ¼” x 11”, fold in half to make a 4 ¼” x 5 ½” card base. Die cut background layer from Timeless Amour Paper Collection using Die # 7 (largest) from the A2 Matting Basics A Die Set. Distress edges and adhere to cardbase.
For the pocket, die cut a layer from bronze metallic cardstock and another layer from Timeless Paper Collection using Die # 5 (from smallest) from the A2 Matting Basics B Die Set. Distress the designer paper piece around 4 sides, adhere to metallic piece and then to card to make the pocket.
Die cut heart with bronze metallic cardstock. Stamp heart image on Natural White cardstock with Rich Cocoa Ink, color with Copic markers, cut around heart and glue behind metallic heart. Adhere to card pocket using foam squares.
For the tag, die cut a layer from bronze metallic cardstock and another layer from Timeless Paper Collection using Die # 6 ( second largest) from the A2 Matting Basics B Die Set. Distress the designer paper piece around 4 sides and adhere to metallic piece.  Cut top corners and punch a hole in the middle for ribbon. Stamp sentiment on tag with Rich Cocoa Ink. Die cut small heart from metallic cardstock and adhere to tag as pictured.


Stamp flowers and leaves on designer paper, die cut with coordinating dies. Shape petals, ink edges and layer together to form flowers. Embellish flower centers with pearls and glue flowers and leaves to top of tag. Color seam binding ribbon with distress ink and attach to tag.

Be sure to visit the Heartfelt Creations Blog to see more projects created by the Design Team Members.

Thanks for visiting! Hugs!

Marisa

Wednesday, November 21, 2012

JustRite Papercraft - Amazing Paper Grace December's Kit Card

Hello Friends!
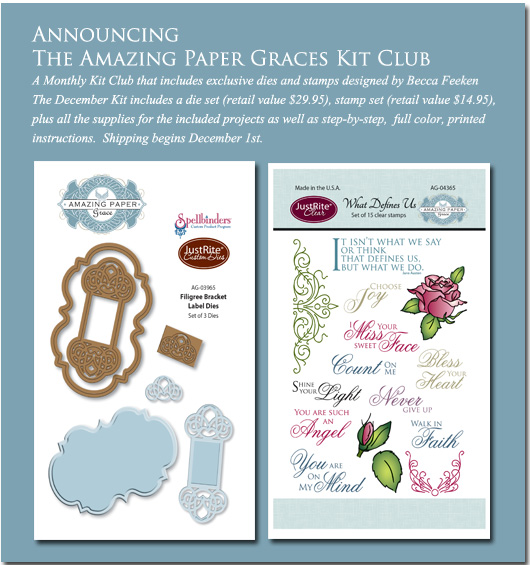
Welcome to another day of Amazing Paper Grace December Kit by JustRite Papercraft!! Becca's December Kit includes everything you need to create four layered and embellished cards along with two doily wraps. Here is the card I created with the stamps and dies in her kit.


AG-04365_What_Defines_Us          AG-03965 Fiigree Bracket Label Dies WEB


For my card I used a 12" x 12" sheet of designer paper, cut it in half, scored at 6", and folded in half to make a 6" x 6" card base. The next designer paper layer in a contrasting color is 5 1/2" x 5 1/2". The background label and filigree label were also die cut with designer paper using Filigree Bracket Label Dies and for the sentiment I used What Defines Us set of clear stamps.


The flowers and leaves were die cut using Rose Creations and Foliage Two by Spellbinders. I used some pearls to embellish the center of the flowers.

For more details and to see Becca's beautiful projects made with this kit, visit Amazing Paper Grace December's Kit or go to Becca's Blog.

Supplies:
JustRite Papercraft: Amazing Paper Grace December Kit
Spellbinders: Rose Creations and Foliage Two
Other: Romantique Paper Collection by Prima Marketing, Distress Inks by Rangers, Tuxedo Black Memento Ink by Tsukineko, Pearls.

Be sure to visit the following JustRite Designer Team Members to see their beautiful projects created with Becca's December Kit.

JustRite Inspiration


Thanks for visiting! Hugs!

Marisa


Tuesday, November 20, 2012

JustRite Papercraft - Amazing Paper Grace December's Kit Tag

Hello Friends!
Today, I would like to share this tag with you which I created using the new Amazing Paper Grace December's Kit by Becca Feeken from JustRite Papercraft. This is another beautiful kit with all the supplies you need to create Becca's projects. This kit also includes a set of brand new stamps and dies that are exclusive to this kit.


To make this tag, I first die cut the the tag base twice with designer paper using Filigree Bracket Label Dies and then I embossed it using M-Bossabilities Enchanted, Design B. The filigree label for the sentiment was also die cut and then adhered to tag using foam squares. The sentiment is from the What Defines Us set of clear stamps. I also die cut two filigree pieces for the top and bottom of tag and added some pearls.
For the flowers and leaves, I used Bitty Blossoms die set by Spellbinders. I die cut the flowers using designer paper and then added some distress ink on the edges.
The ribbon for the bow is from The Stamp Simply Ribbon Store, they have a great variety of seam binding colors!

For more details and to see Becca's beautiful projects made with this kit, visit Amazing Paper Grace December's Kit or go to Becca's Blog.

Supplies:
JustRite Papercraft: Amazing Paper Grace December's Kit
Spellbinders: Bitty BlossomsM-Bossabilities Enchanted, Grand Calibur
Other: Firefly Paper Collection by Prima Marketing, Distress Inks by Rangers, Pearls, Ribbon from The Stamp Simply Ribbon Store, Foam Squares by Scrapbook Adhesive by 3L.

Be sure to visit the other Design Team Members to see their beautiful projects created with Becca's Kit.


Thanks for visiting! Hugs!

Marisa


Wednesday, November 14, 2012

JustRite Papercraft November Release - Congratulations Card

Hello Friends!
Welcome to Day 2 of the JustRite Papercraft November Release. Today we are showcasing Premium Labels, a beautiful set of 19 clear stamps, and Genuine Friend Background Stamp. For my card I chose Premium Labels and also the gorgeous Wings of Love Background Stamp, which was showcased yesterday.


Welcome to Justrite Stampers | Free card making idea with supply lists, scrapbooking and craft ideas with rubber stamps, clear stamps and cling stamps | Secure ordering online. | Ships in 24 hours.      Welcome to Justrite Stampers | Free card making idea with supply lists, scrapbooking and craft ideas with rubber stamps, clear stamps and cling stamps | Secure ordering online. | Ships in 24 hours.

For my card I stamped Wings of Love Background Stamp on beige cardstock with Tuxedo Black Memento Ink. I colored the image with Tim Holtz Distress Markers. I added some Stickles glitter glue to the flowers. For the sentiment I used Premium Labels stamps and then I die cut label with coordinating die from Antique Labels One Dies. I adhered the label to card with foam squares.


The flowers were die cut with Bitty Blossoms, and the leaves were die cut with Foliage and Foliage Two dies by Spellbinders. 
The bling around the card is from Fabscraps, I used Glossy Accents to adhere bling to card.

Supplies
Spellbinders: Bitty BlossomsFoliage and Foliage Two 
Other: Beige Cardstock, Tuxedo Black Mememto Ink by Tsukineko, Tim Holtz Distress Markers and Distress Inks by Ranger, Glossy Accents by Ranger, Stickles Glitter Glue, Bling from Fabscraps.

Be sure to visit the other Team Designer Members to see their beautiful creations.

Marisa Job (here)


Thanks for visiting! Hugs!

Marisa

Tuesday, November 13, 2012

Heartfelt Creations Wednesday - Love Lives Here Card

Hello Friends!
Welcome back to another Heartfelt Creations Wednesday! Today I would like to share with you another card I made for Heartfelt Creations using the Vintage Floret Collection. I love to make flowers with this collection of beautiful flower stamps and coordinating dies. The designer paper in the background is also from this beautiful collection.


Products Used:

Other Products:
Fancy Framed Tags One Dies and Awesome BlossomsM-Bossabilities by Spellbinders, Black and Natural White Cardstock by Neenah Papers, Bronze Metallic  Cardstock, Galaxy Gold Brilliance Pigment Ink and Tuxedo Black Memento Ink by Tsukineko, Vintage Photo and Peeled Paint Distress Ink by Rangers, Glossy Accents by Rangers, Foam Squares by Scrapbook Adhesive by 3L.

Instructions:
Top fold card base 6”x 6”. Cut black cardstock to 6” x 12”, fold in half for card base. Cut designer paper layer to 5 ¾” x 5 ¾”, emboss with Awesome Blossoms M-Bossabilities, ink embossed areas with distress ink and adhere to card.
Die cut Decorative Lace border with bronze metallic cardstock, trim to fit right side of card as pictured and glue to card.
Stamp flowers using Gold Brilliance pigment ink onto black cardstock. Die cut with matching dies, shape petals and layer to form flowers. Attach Cameo Sparklets to center of flowers.  Stamp Belle Rose leaves on Natural White cardstock, die cut with matching die, and color with Peeled Paint distress ink. Die cut leaves from the Western Bronco die set and color with Peeled Paint distress ink.
Die cut Fancy Framed Tags One with Bronze metallic cardstock. Stamp sentiment on Natural White cardstock with Tuxedo Black ink, die cut and glue onto tag. Adhere to top of card.
Arrange flowers and leaves on card as pictured and adhere using Glossy Accents and foam squares.


Be sure to visit the Heartfelt Creations Blog to see more projects created by the Design Team Members.

Thanks for visiting! Hugs

Marisa

JustRite Papercraft November Release - Happy Birthday Card

Hello Friends!
I'm so excited about this month's stamp release from JustRite Papercraft!! These new stamps are just beautiful! Today we are showcasing 2 new stamps, Song Bird Background Stamp and Wings of Love Background Stamp. For my card I used Song Bird Background Stamp.


Welcome to Justrite Stampers | Free card making idea with supply lists, scrapbooking and craft ideas with rubber stamps, clear stamps and cling stamps | Secure ordering online. | Ships in 24 hours.


For my card, I stamped the background twice on beige cardstock with Black Tuxedo Memento Ink. I colored the image with Copic markers. I fussy cut the flowers and bird from one of the cards and attached to card using foam squares. 


I stamped the sentiment using Premium Labels clear stamp set and then die cut the sentiment with coordinating die from Antique Tags One Dies. I also die cut Fancy Frame Tags One by Spellbinders and adhered to card as pictured.
For the border, I used Martha Stewart Punch Around the Page punches. For the bow, I used seam binding ribbon from The Stamp Simply Ribbon Store.

Supplies:
Other: Martha Stewart Punches, Black Tuxedo Memento Ink by Tsukineko, Kraft, Orange and beige cardstock, Copic Markers, Distress Inks by Rangers, Stickles, Seam Binding Ribbon from The Stamp Simply Ribbon Store.

Please be sure to visit the JustRite Papercraft Design Team Members below to see more projects!!

Thanks for visiting! Hugs!

Marisa


Tuesday, November 6, 2012

Heartfelt Creations Wednesday - So Grateful for You Card

Hello Friends!
Welcome to another Heartfelt Creations Wednesday!! I love making flowers with the new Vintage Floret Collection, the flower stamps are just beautiful. For my card today, I also used Vintage Floret Paper Collection to make the flowers.


Products Used:

Other Products:
Metallic Pearl Cardstock, Grand Labels Eleven and Fancy Lattice by Spellbinders, Tuxedo Black Memento Ink by Tsukineko, Brushed Corduroy, Victorian Velvet and Peeled Paint Distress Inks by Rangers, Want 2 Scrap Pearls, Pink Ribbon.


Instructions:
Card measures  5  5/8” x 4”. For card base, fold 8 ½” x 11” metallic pearl cardstock in half, die cut below the folding line using second from smallest die from Grand Labels Eleven die set.  Using same die, cut two more pieces using designer paper. Adhere one of them to inside of card.
Die cut Fancy Lattice with metallic pearl cardstock and die cut again with second from smallest die from Grand Labels Eleven die set.
To create the frame for the front of the card, use the smallest die from Grand Labels Eleven die set. Tape on the front of the card to secure in place and run through the Grand Calibur. Follow the same step for the extra designer paper piece.  Adhere fancy lattice piece to card front and then adhere the designer paper frame on top.
Stamp several flowers and leaves on designer paper and die cut with coordinating dies. Add some color with distress inks, shape petals and layer to form flowers.
Cut out sentiment from designer paper and ink edges with distress ink. Adhere to fancy lattice card front and arrange flowers around as pictured. Make a bow with ribbon and attach to card.

Be sure to visit the Heartfelt Creations Blog to see more projects created by the Design Team Members.

Thanks for visiting!! Hugs!

Marisa