Thursday, November 26, 2015

Heartfelt Creations - 3D Flip Fold Album

Hello Friends,
Today we have a wonderful release from Heartfelt Creations!! Everything you need to make beautiful albums the easy way. Heartfelt Creations has created 3D Flip Fold Albums, Flip Fold Inserts, Borders and Pocket Die sets. With these products you will be able to create and decorate your own albums. Here is the album I created with all these beautiful products.


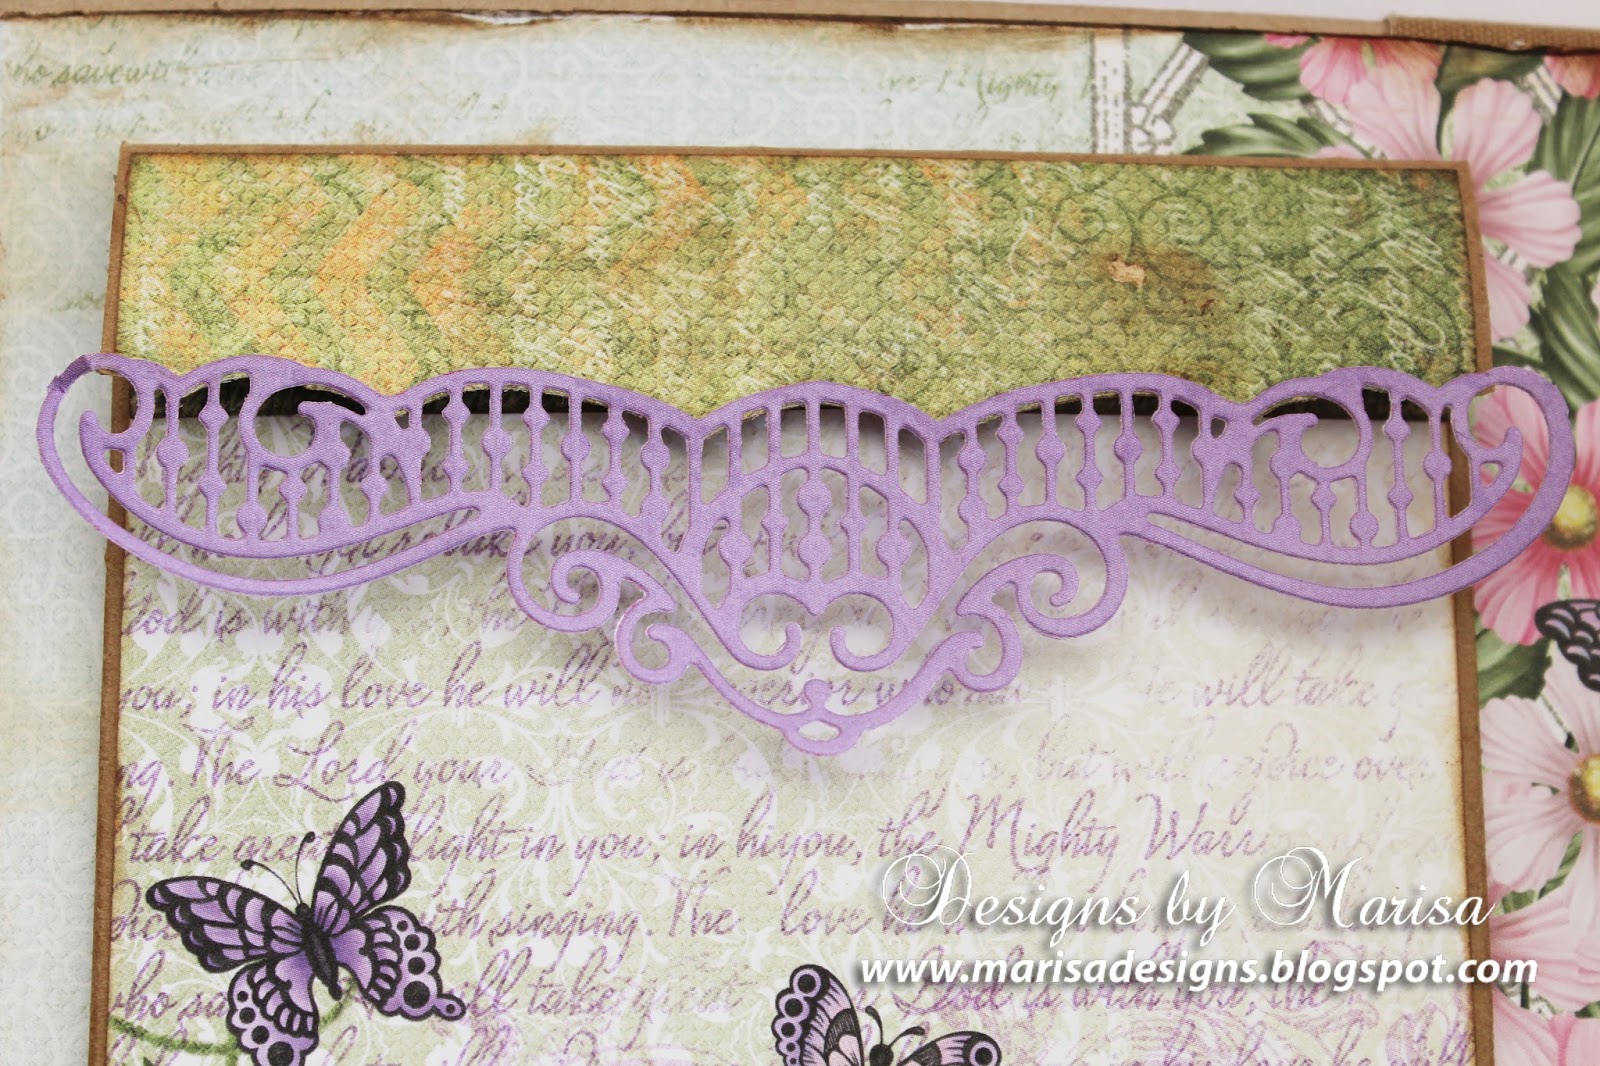


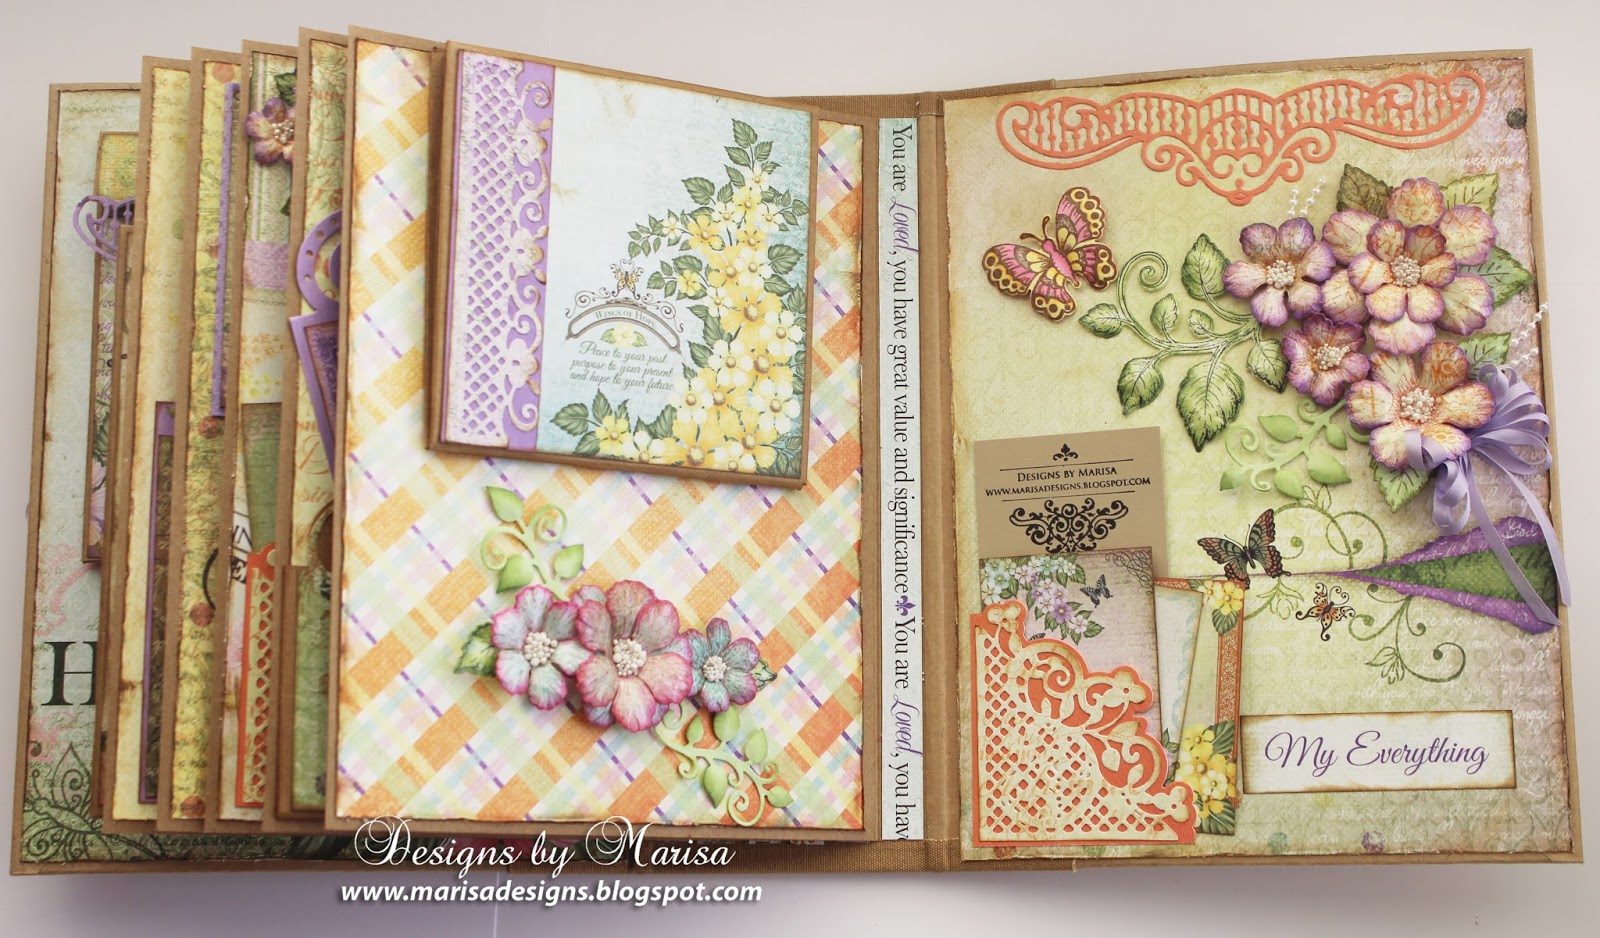


Butterfly Medley 3D Flip Fold Album

Products Used:

HCD1-783 Border Essentials Die Set

Other Products:

Cardstock in Green, Pink, Green, Orange and Purple, Ranger Distress Inks ( wilted Violet, Picked Raspberry, Peeled Paint, Broken China, Brushed Corduroy),  Spellbinders Grand Calibur, Foam Squares, Glue, Silk Ribbon, Pearl String, Tape, Hot Glue.

Project Instructions:

Album cover measures 7” x 9” and pages measure 6 ½” x 8 ½”. Cover front, back covers and spine using Butterfly Medley Paper Collection. Distress and color edges of panels with distress inks before adhering to album with strong tape.
Stamp multiple flowers and leaves using Botanical Rose cling stamps and pink chalk ink onto paper collection. Die cut flowers and leaves with coordinating Botanical Wings die set. Color flowers and leaves with distress inks, shape with Deluxe Flower Shaping Kit. Embellish center of flowers with white Prills.
Cover Pocket and Flip Fold Inserts of your choice with paper collection and attached to pages. Attach magnets where needed to secure inserts and pockets. Cover album pages with paper collection using strong tape or glue.
Die cut several decorative borders from color cardstock using Borders and Pockets die sets. Attach to album front cover, pages, pockets and flip fold inserts as pictured.
Die cut several tags from paper collection using Luggage and Tags die set, color edges with distress ink and insert in pockets. Cut out card fronts from paper collection and insert in pockets or flip fold inserts.
Adhere flowers and leaves to front cover and pages using hot glue. Embellish flower clusters with pearls and silk ribbon bows. Stamp and die cut several butterflies, color with distress inks and glue to cover and pages.
Visit my blog for more details and pictures of every page.

Be sure to visit Heartfelt Creations Blog for more Inspiration.

Thanks for visiting!! Hugs!

Marisa


Friday, November 20, 2015

JustRite Papercraft - Multi-Step Poinsettia Card and Box Ensemble

Hello Friends,
Welcome to the JustRite Papercraft November Release. Today I'm showcasing a new set called Christmas Mini Tags Clear Stamps which coordinates with Snowflake and Tag Dies. I love these sets and they are great for the Holidays. I'm also showcasing a beautiful new die set called Multi-Step Poinsettia Dies.


I decided to make a card and box ensemble using the 3 new stamp and die sets. My Kraft card base is 4 1/4 x 5 1/2, I used green and light brown cardstock for the next layers. 
I die cut the poinsettias and leaves from red and green cardstock with Multi-Step Poinsettia Dies, I colored the edges with gold paint and embellished the center of flowers with gold micro-beads. For the tag I used Christmas Mini Tags Clear Stamps to stamp the sentiment and coordinating Snowflake and Tag Dies to die cut small tag. 
I used the same set to die cut the snowflake from red and white cardstock and attached to card with foam squares. For the bow I used silk ribbon and then attached to card with glue.
The treat box is about 2 1/2" wide and 2 1/4" high. I covered the 4 panels of the box and lid with red cardstock. I die cut a snowflake from white cardstock, cut the corners and glued on each side.
The poinsettias and tag were created the same way as the card. 

Supplies:

Other Supplies: Kraft Cardstock, Bo-Bunny's Double Dot (Wild Berry Vintage, Wasabi Vintage, Decaf Vintage, Chiffon Flourish), Ranger Distress Inks, Memento Tuxedo Black Ink, 3D Stamp Paint Gold, Micro-Bead, Gold Rhinestones, Silk Ribbon, Foam Squares.


Be sure to visit the links below for more inspiration from the JustRite Design Team.

Marisa Job (here)

Heidi Blankenship (posting on Saturday)

Michele Kovack (posting on Saturday)


Thanks for visiting! Hugs!

Marisa


Tuesday, November 10, 2015

Heartfelt Creations - All Glammed Up Collection

Hello Friends,
Cue the spotlight and roll out the red carpet because the new All Glammed Up Collection by Heartfelt Creations has arrived! This ultra feminine compilation of glamorous flowing gowns, lavishly flower filled heels and stunning rose accents all showcased in elegant tones of reds, blacks and golds are the perfect combination for any stylish celebration and are sure to have your magnificent paper crafts taking centre stage and dominating the runway! Modern patterns and motifs mixed with eclectic and vintage style lend the perfect blend to any masterpiece whether you wish to dress your project up or down.  The grand and regal footwear illustrations coupled with the complementing dies are perfect to create that specialty shaped invitation for a special bridal shower or girls night out. The wide array of sentiment stamps included in the collection are ideal to have on hand for a variety of occasions, while the gracefully detailed and lace like gown and floral sprays and accents are sure to bring that extra touch of splendor to all of your layouts, cards or altered art projects.  So channel you inner fashionista, gather your finest glitters, rhinestones, ribbons and laces and join us in celebrating life's beautiful moments with this stylish, timeless and classy collection.  


Products Used:


Other Products:

Neenah Papers Natural White Cardstock, Ranger Distress Ink Pad and Distress Markers (Brushed Corduroy, Peeled Paint, Spiced Marmalade, Picked Raspberry), Zva Creative Self Adhesive Embellishment (Pearls), Foam Squares, Spellbinders Grand Calibur.

Project Instructions:

Cut a 12” x  5” piece of natural white cardstock, fold in half to make a 6” x 5” card. Die cut card with All Glammed Up Shoe Die to make card base. 
Stamp All Glammed Up Shoe Cling Stamp with black ink on natural white cardstock. Die cut stamped shoe with coordinating die. Color with distress inks and markers and adhere to shoe card base. 
Stamp another shoe, fussy cut and color flowers and leaves. Shape flowers with Deluxe Flower Shaping Kit and then adhere to card base using foam squares. 
Embellish shoe with self-adhesive pearls and bronze prills to center of flowers.


Be sure to visit Heartfelt Creations Blog for more Inspiration.

Thanks for visiting! Hugs!

Marisa


Thursday, November 5, 2015

Craft Hoarders Anonymous Hop - Just For You Card

Hello Friends,
Welcome to the November Craft Hoarders Anonymous Hop! You should be coming to my blog from Karen's BlogAfter visiting me, hop over to Christy's Blog next. To start at the beginning of the hop, and for the full list of Bloggers, go to Gloria's Blog


Spellbinders Flower Play die set:


I started my card by creating a 5" x 5" card base using pink card stock. I die cut the next layer using Just For You Pansy die set and kraft cardstock. The topper inner shape was die cut with From me to You die set in natural white cardstock. The sentiment was die cut from kraft cardstock and adhered to card using glue. 
The flowers and leaves were die cut with Spellbinders Flower Play die set. I colored the flowers with distress ink and embellished the center of the flowers with micro-beads. 

Supplies:

Spellbinders Dies: Flower Play
Tonic Studios Dies: Just For You Pansy, From Me To You.
Other Supplies: Neenah Papers Natural White, Pink and Kraft Cardstock, Ranger Distress Ink, Micro-beads.


Thanks for visiting! Hugs!

Marisa


Tuesday, October 27, 2015

Heartfelt Creations - You Are My Everything Card

Hello Friends,
Today I have a card created with the beautiful Italiana Riviera Collection from Heartfelt Creations.


Products Used:


Other Products:

Neenah Papers Natural White Cardstock, Ranger Distress Mini Ink Pads (Peeled Paint, Dusty Concord, Seedless Preserves), Memento Black Tuxedo Ink, Spellbinders Grand Calibur, Lavender Silk Ribbon, Foam Squares.

Project Instructions:

To create card base cut a 6” x 12” piece of cardstock from the Italiana Riviera Paper Collection. Score at 2 ½”, 3 ¾”, 8 ¼”, and 9 ½”. 
Die cut left and right sides of card using the vine border die from the Italiana Grape Clusters die set. Die cut 2 panels using the intricate vine border and paper collection, distress edges and adhere to left and right sides of card. 
Cut 2 panels measuring 1” x 5 ¾” from paper collection, distress the edges and adhere to card. 
Cut a 4 ¼” x 5 ¾” panel from paper collection, distress and color the edges and adhere to card front with foam squares. Cut out sentiment from paper collection and adhere to card with foam squares.
Stamp flowers with black ink onto white cardstock using Arianna Blooms stamp set.  Die cut flowers using Arianna Blooms coordinating die, shape with Deluxe Flower Shaping Kit, color edges with distress inks and glue to card front.
Stamp and die cut leaves using Open Leaf stamp set and coordinating Classic Leaf die. Shape leaves, color with distress inks and glue to card front under flowers.
Make a bow with silk ribbon and glue under small flower.

Be sure to visit Heartfelt Creations Blog for more Inspiration.


Thanks for visiting! Hugs!

Marisa


Tuesday, October 20, 2015

JustRite Papercraft - Peonies Clear Stamps

Hello Friends,
Welcome to the last day of the JustRite Papercraft October Release. Today we are showcasing Peonies Clear Stamps and coordinating Peonies and Mason Jar Die Set. These are my favorite sets this month. I had so much fun coloring the flowers.


I started my card by creating a 6" x 6" card base from pink cardstock. The next layer was cut a bit smaller from green cardstock. The background layer was cut to 5 1/2" x 5 1/2" from designer paper and adhered to card with foam squares. 
I stamped the jar and multiple flowers from the Peonies Clear Stamps set and die cut with coordinating Peonies and Mason Jar Die Set. I colored the jar and flowers with Chameleon Markers and then adhered to card with foam squares as pictured.
The decorative corners were die cut with Spellbinders Draping Vines Elements.


Supplies:

Spellbinders Dies: Draping Vines Elements.
Other Supplies: Pink and Green Cardstock, My Bestie Vintage Romance Paper, Chameleon Markers, Foam Squares, Distress Ink Pad. 

Be sure to visit the links below for more inspiration from the Design Team.


Thanks for visiting! Hugs!


Marisa


Monday, October 19, 2015

JustRite Papercraft - Pinwheel Daisies

Hello Friends,
Welcome to the JustRite Papercraft October Release. Today we are showcasing another pretty stamp set called Pinwheel Daisies Clear Stamps and a coordinating die set called Pinwheel Daisies Die Set. I also used Grand Wedding Wishes Clear Stamps for the sentiment.


This card measures 7 1/2" x 6 1/2". I created the 5" x 6" background by stamping the largest image from Pinwheel Daisies Clear Stamps with Versamark and black embossing powder and then heat set. I also stamped more flowers on another piece of natural white cardstock and die cut with coordinating Pinwheel Daisies Die Set and adhered to card with foam squares. I colored the flower images with Distress markers.
I die cut 2 Gemini Dies - Phoenix from purple cardstock and adhered to both sides of card. 
The sentiment from Grand Wedding Wishes Clear Stamps was stamped with black ink and the label was die cut with Canadian Collection - Montreal and adhered to card with foam squares.


Supplies:

Creative Expressions - Craft Dies by Sue Wilson: Gemini Dies - Phoenix, Canadian Collection - Montreal.
Other Supplies: Neenah Papers Natural White Cardstock, Purple Cardstock, Versamark, Black Embossing Powder, Distress Inks Mini Pads, Distress Markers, Foam Squares.

Be sure to visit the links below for more inspiration from the design team.

Marisa Job (here)


Thanks for visiting! Hugs!

Marisa


Saturday, October 17, 2015

JustRite Papercraft - Morning Splendor

Hello Friends,
Today is Day 3 of the JustRite Papercraft October Release. We have a beautiful stamp set to share with you called Morning Splendor Clear Stamps.


I started this card by creating a 5" x 6" card base from blue cardstock. I cut a smaller layer from purple cardstock and adhered to card.
For the background layer I used watercolor cardstock and Distress inks. I stamped the larger flower from Morning Splendor Clear Stamps with black ink and colored with Distress markers. I stamped the flower image a second time on another piece of watercolor cardstock. I colored the image with Distress markers, fussy cut the flowers and leaves and adhered to card with foam squares.
I also used Configurations - Lattice Arched Adornment to die cut the pretty decorative piece from blue cardstock.


Supplies:

JustRite Papercraft: Morning Splendor Clear Stamps
Creative Expressions - Craft Dies by Sue Wilson: Configurations - Lattice Arched Adornment'
Other Supplies: Watercolor Cardstock, Blue and Purple Cardstock, Ranger Distress Ink Mini Pads, Distress Markers, Foam Squares.

Be sure to visit the links below for more inspiration from the Design Team.


Marisa Job (here)


Thanks for visiting! Hugs!

Marisa


Friday, October 16, 2015

JustRite Papercraft - Framed With Love

Hello Friends,
Welcome to Day 2 of the JustRite Papercraft October Release. Today we are showcasing Framed with Love Clear Stamps, a beautiful set of 10 clear stamps. For my card I also used Grand Wedding Wishes Cling Stamps


I started my card by creating a 5 1/2" x 5 1/2" card base with kraft cardstock. I cut 2 smaller layers with designer paper, distressed the edges and then adhered to card. 
I die cut the pretty background with Tonic Studios Pansy die from designer paper and adhered to card. The front sentiment was stamped from the Grand Wedding Wishes Cling Stamps set with brown ink. 
The flowers and leaves were die cut with Spellbinders Flower Play die set. I embellished the center of flowers with micro-beads. For the bow I used silk ribbon.
For the greeting inside the card I used the frame and sentiment from Framed with Love Clear Stamps and brown ink. 

Supplies:

Spellbinders Dies: Flower Play die set.
Tonic Studios: Pansy.
Other Supplies: Neenah Papers Kraft Cardstock, Prima Marketing Royal Menogerie, Micro-Beads, Silk Ribbon, Foam Squares, Ranger Distress Inks.

Be sure to visit the links below for more inspiration from the Design Team.
Marisa Job (here)


Thank for visiting!! Hugs,

Marisa